Resizing a Microsoft Word document is not difficult at all. You don’t have to wait for your document to be completed. You can easily resize while working on the same document.
Fortunately, there are several tricks that can help you resize a Word document without sacrificing its formatting or readability.
In this article, we list some of the most effective ways to resize a Microsoft Word document without losing any of the formatting. You can learn this in any way you like.
Table of Contents
Resize a Microsoft Word Document
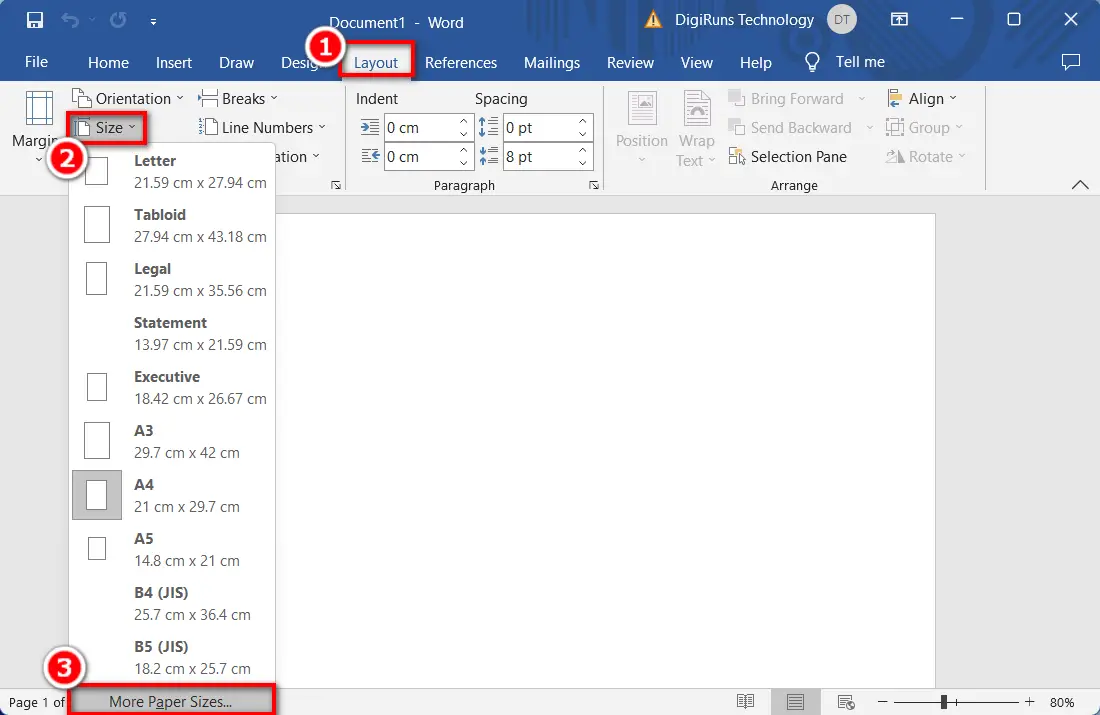
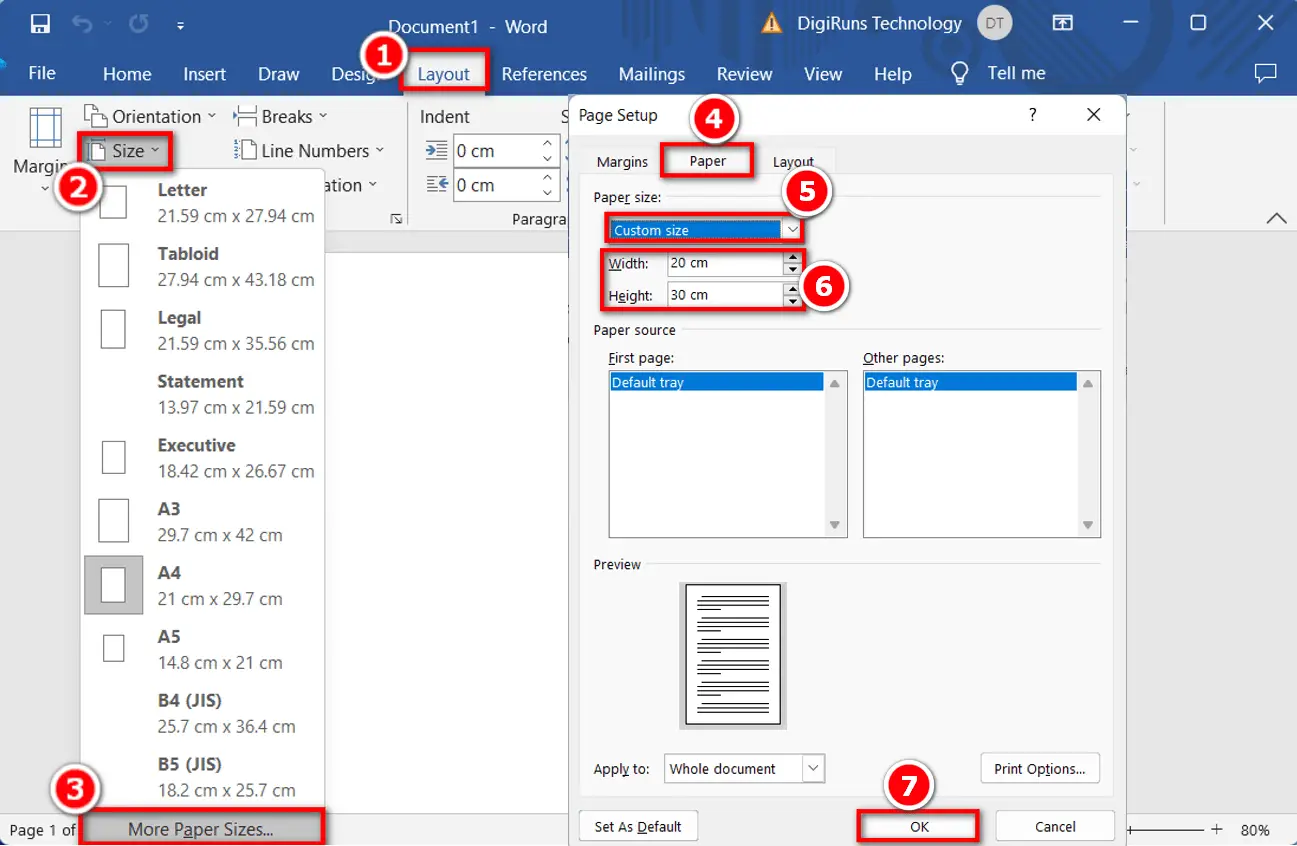
Open a Word document you want to resize. Click “Layout” → Size,” and “More Paper Sizes.”
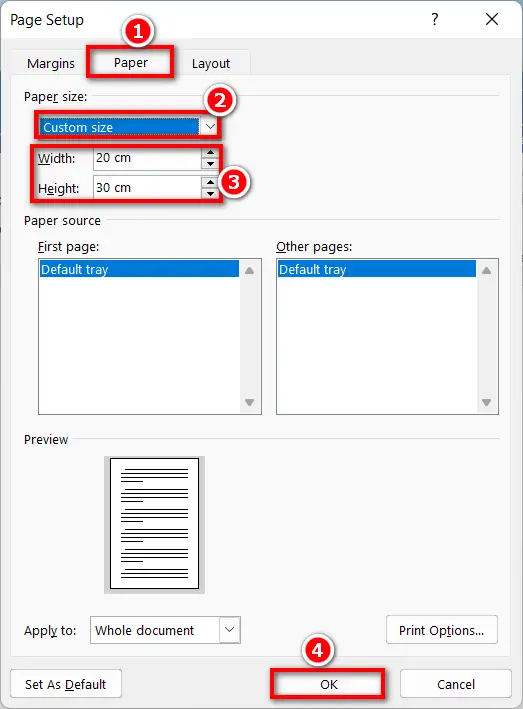
Under “Paper size“, make sure to select “Custom size.” → Set the width and Height in cm that you want to resize a Word document→ Lastly, click “Ok“.
Change the Size of a Selected Word Document
A Word document’s size may be adjusted for a number of reasons. In the first place, it could make the text simpler to read and navigate. You may make sure that all of the text and photos are shown correctly by changing the page’s size.
Additionally, by making a document smaller and taking up less space, it may be shared and emailed more easily.
Finally, by resizing the document, you may improve content organization and present more data on a single page.
How many ways can we resize a Word document?
There are several ways to resize a Word document without sacrificing its formatting or readability.
Can I resize an image without changing its proportions?
Yes, hold the “Shift” key while dragging the corner handles to maintain the aspect ratio.
How do I scale down the content of an entire document?
Go to “File,” select “Options,” choose “Advanced,” and adjust the “Scale content for A4 or 8.5 x 11” setting.
Is it possible to resize using exact measurements?
Yes, enter precise dimensions in the “Size and Position” dialog box for accurate resizing.
What’s the shortcut to fit an image to the page width?
Double-click the image or right-click and choose “Size and Position,” then select “Move with text” and “Fix position on page.”
What’s the process for resizing using the “Page Layout” tab?
Go to “Page Layout,” click “Size,” and choose a preset or customize the page dimensions.
Can I change the paper size to a custom measurement?
Yes, go to the “Layout” tab, click “Size,” choose “More Paper Sizes,” and input your custom dimensions.
Is it possible to resize a document for booklet printing?
Yes, go to the “Layout” tab, click “Margins,” choose “Book Fold,” and set margins for booklet printing.