
Do you often waste time typing employee names, business names, nation names, state names, currency names, and family names into an Excel worksheet? With the custom Autofill series, you can stop wasting time by entering the same information over and over again.
Once you’ve made a custom AutoFill list, you can use it frequently without having to type again. Start them off using various methods.
Table of Contents
How to Create a Custom AutoFill Series List in Excel
There are two ways to create a custom auto-fill list in Excel. These are explained below.
Method 1
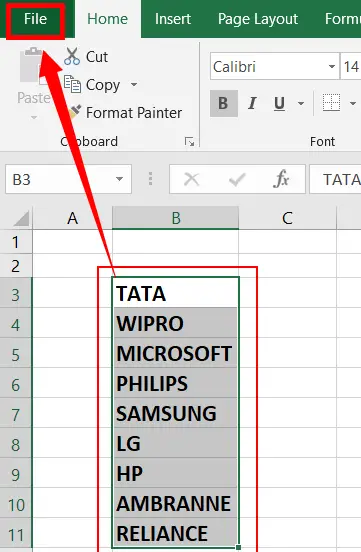
Prepare the list of data that you want to use to create a custom AutoFill series list
Go to the File menu (in 2013 and later versions) or the Office button (in 2010 and earlier versions).
Select “options” from the file menu’s bottom to bring up the Excel options dialogue box after opening the File menu or Office button.

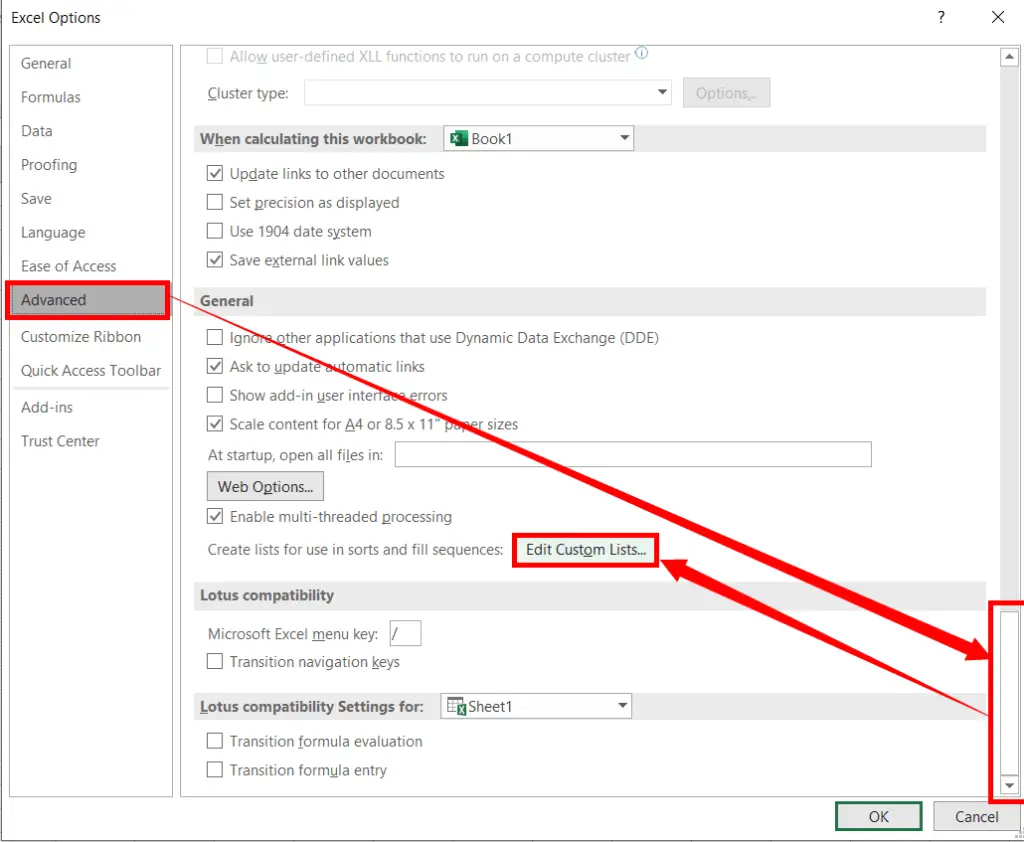
Select Advance under Excel options
Then scroll down using the scroll bar till you get the Edit Custom List option
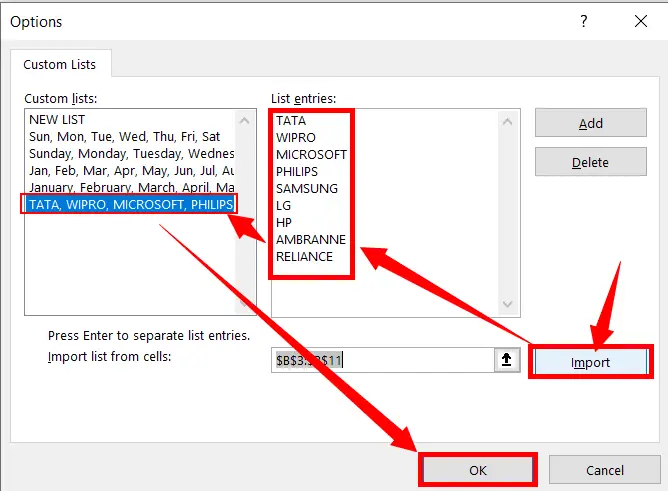
After that, a custom list dialogue box will open
Now click on the import to import your data list from the cells
Then click OK in the Excel Options dialogue box, and then click OK.
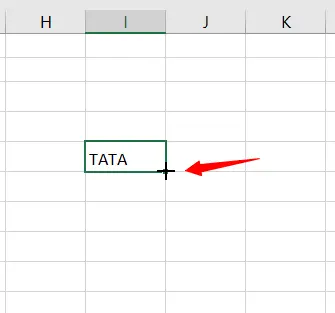
Now enter one of the data lists that you have created
Then drag the fill handle to create a list.
Method 2:
Go to the File menu in 2013 and later versions for the office button in 2010 and earlier versions
After opening the file menu or Office button
Select the options which appear at the bottom of the file menu to open the Excel Options dialogue box
Select advance under Excel options
Then scroll down the editing options using the scroll bar till you get the edit custom list option
After that, a custom list dialogue box will open
Type the new list separately by pressing enter key under list entries
Then click on the add button, click ok and again press ok
Now enter one of the data lists that you have created
Then drag the fill handle to create a list.
Video Tutorial
What are the benefits of the custom autofill series list?
A custom autofill list is the solution for you to stop typing repeatedly and wasting your time.
What’s the purpose of a custom AutoFill series list?
A custom AutoFill series list allows you to quickly populate cells with specific data patterns or sequences, saving time and ensuring consistency in your Excel worksheets.
Can I edit or remove a custom AutoFill series list?
Yes, you can edit or remove a custom AutoFill series list by going to “File” > “Options” > “Advanced” > “Edit Custom Lists” in Excel and making the necessary changes or deletions.
How do I use a custom AutoFill series list in Excel?
Once created, you can simply type the starting value of your custom series, and then drag the fill handle down or across to fill cells with the pattern defined in your custom list.
Are custom AutoFill series lists compatible with Excel’s Flash Fill feature?
Yes, custom AutoFill series lists work well with Excel’s Flash Fill, making data entry even more efficient and accurate.