Microsoft Word is a powerful word processing application that allows us to create various documents with a range of formatting options.
One such useful feature is the ability to quickly draw vertical and horizontal lines by using keyboard shortcuts. This can be done wherever we want and at the length we want.
Similarly, it is very useful for creating anything like a biodata form faster. It helps improve the visual appeal and organization of your content.
In this article, we will look at the different methods and techniques for drawing lines in Word.
Table of Contents
Straight Vertical and Horizontal Line/Border
There are six ways to draw lines and borders in any direction you like, these are all explained below
1. Magic for Drawing a Straight Horizontal Line
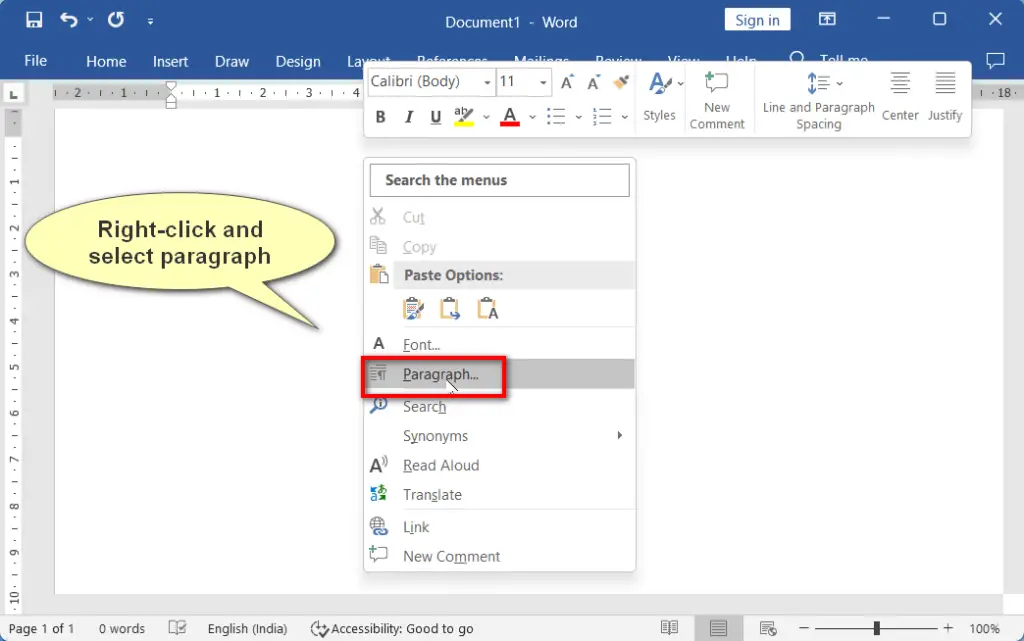
- Right-click anywhere within a blank document.
- Next, select the “Paragraph” option to open its formatting dialog box.
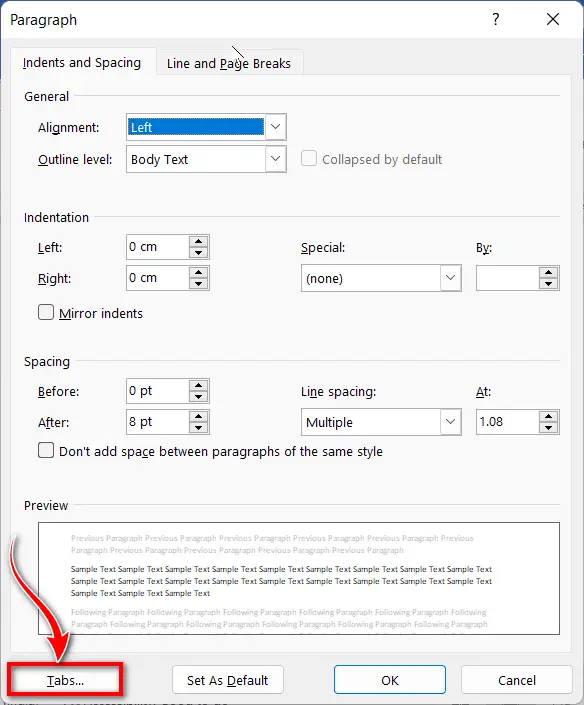
- Click on “Tabs,” located in the lower left corner of the dialog box.
- Please enter the measurement value at which you would like to stop the line. By default, the ruler width is set to 18 cm. For instance, if you want to control the line’s position (at the end) just before the margin, enter 15 cm as the “Tab Stop Position.”
- Ensure that the alignment selection is set to “Left” since we are starting to type text from the left.
- Next, choose one of the line style options available under “Leader.”
- After selecting the desired line style, click on “Set,” and then click “OK.”
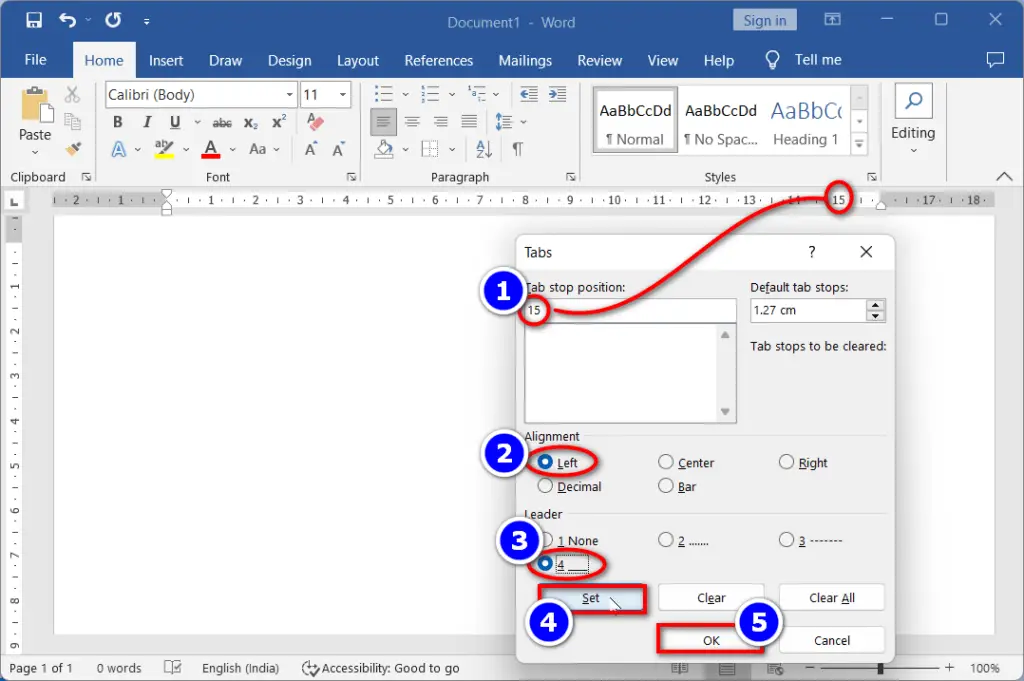
- Regardless of whether you type text or not, you can draw a straight horizontal line by pressing the Tab key.
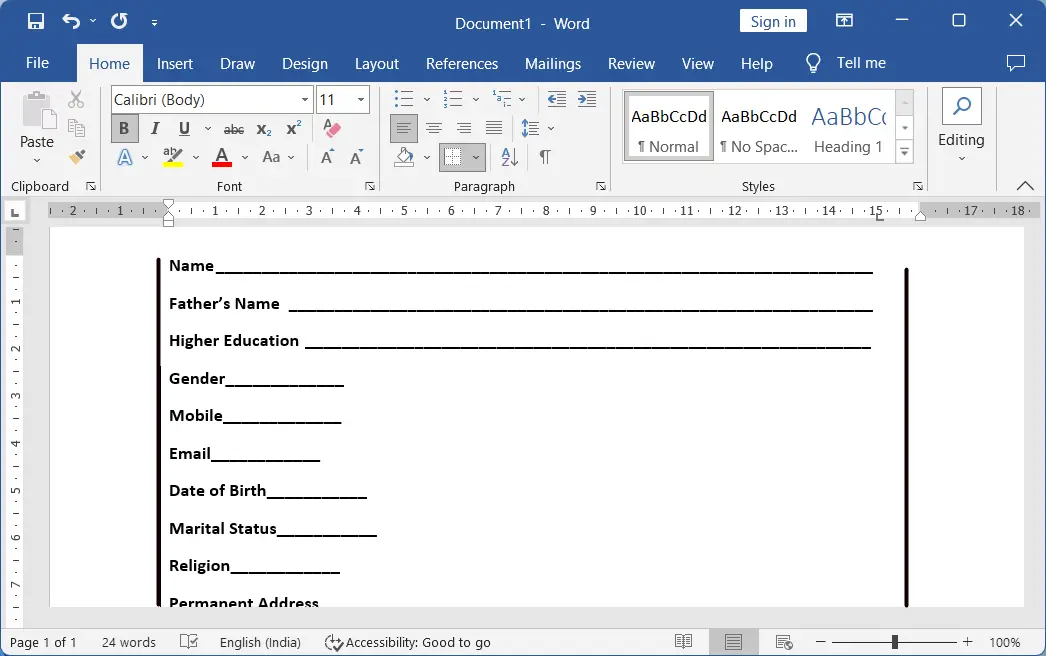
Now we can format a Bio-Data form using the horizontal line:
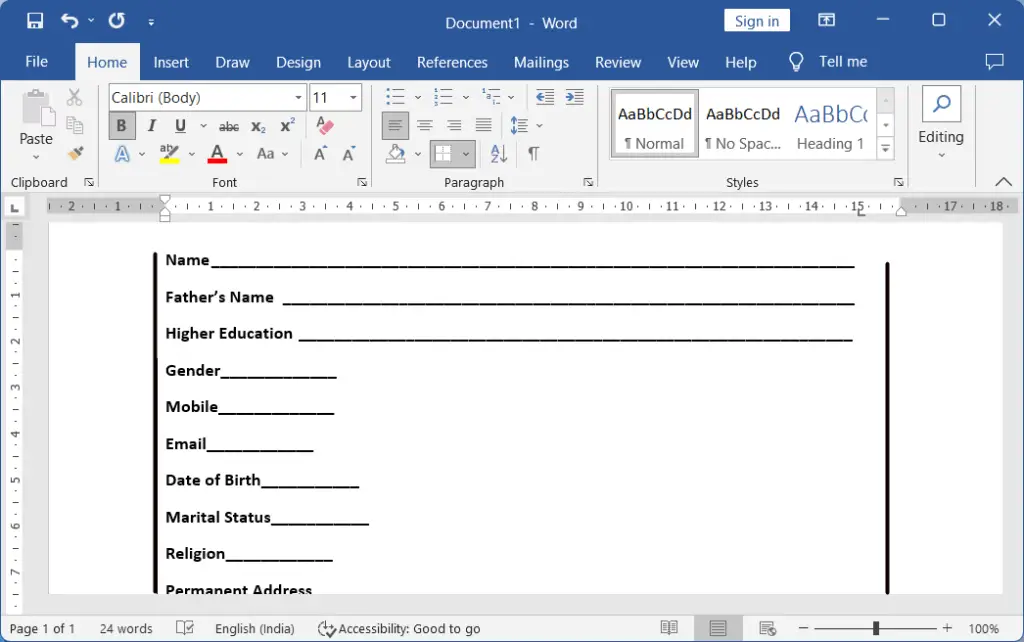
- Open a Word document.
- Type the word “Name” and press the “Tab” key on the keyboard to draw a straight horizontal line.
- Next, continue typing the required fields and drawing straight lines as explained above.
- Then, navigate to the Insert tab and insert a table with the desired number of rows and columns.
- For example, refer to the screenshot to complete the biodata form.
2. Draw different formatted lines using the Keyboard Shortcuts
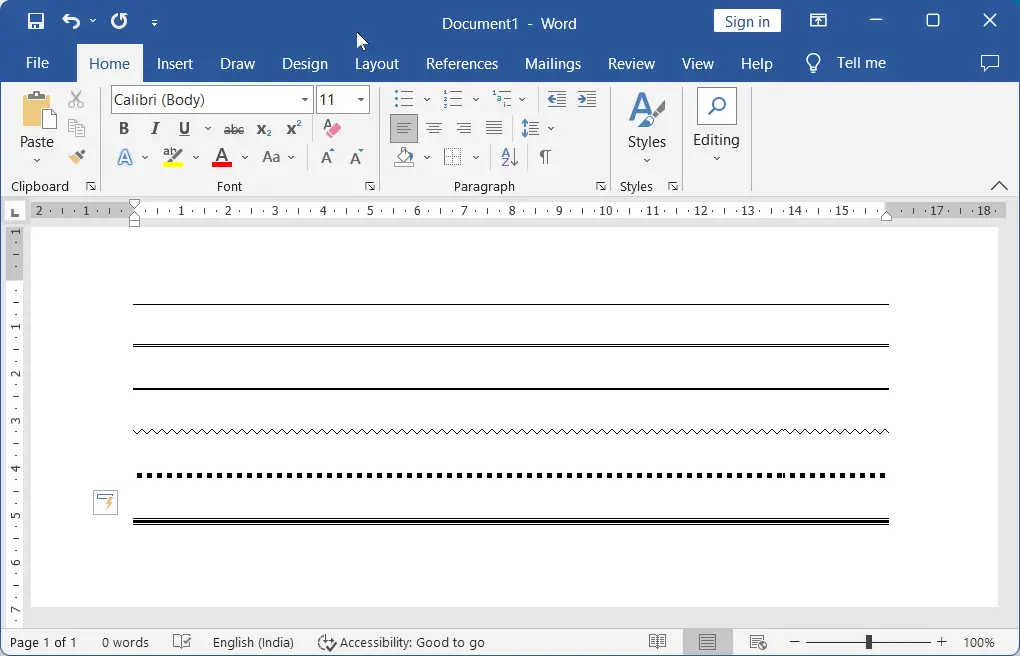
- Press the minus “–” key more than three times to draw a straight, thin line.
- Press the equal “=” key more than three times to draw double-thick lines.
- Press and hold down the “Shift” key, then press the underscore “_” key more than three times, and hit the “Enter” key to draw a straight, thin line.
- Press the tilde “~” key more than three times to draw a straight, curved line.
- Press the asterisk “*” key more than three times to draw a straight dotted line.
- Press and hold down the “Shift” key, then press the “#” key more than three times to draw a line with a thick line between the two thin lines.
Turn Off the Automatic Line Drawing Feature
Follow the steps below to prevent horizontal lines from being inserted when you type three or more shortcut characters related to these features in Microsoft Word or Outlook:
- Click on “File” and then select “Options” to open the Word Options dialogue box.
- Within the dialogue box, choose “Proofing,” then click on “AutoCorrect Options.”
- Navigate to the “AutoFormat As You Type” tab.
- Uncheck the options for “Border Lines.”
- Finally, click “OK” to save the changes.
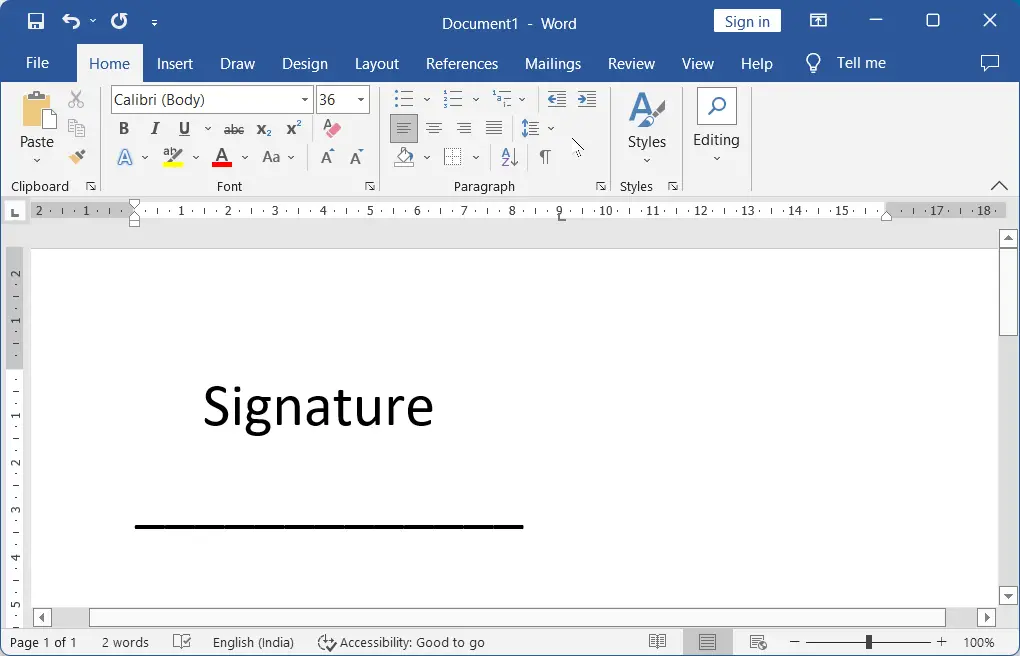
3. Draw a line in Word for Signature
To draw a signature line in Word for Signature, do one of the following:
- Press and hold down the “Shift” key, then press the underscore “_” key more than three times and hit the “Shift + Enter” key to draw a straight, thin line.
- To draw a straight line of the desired length, select the line shape, then press and hold down the “Shift” key while drawing.
4. Draw Borders in Word
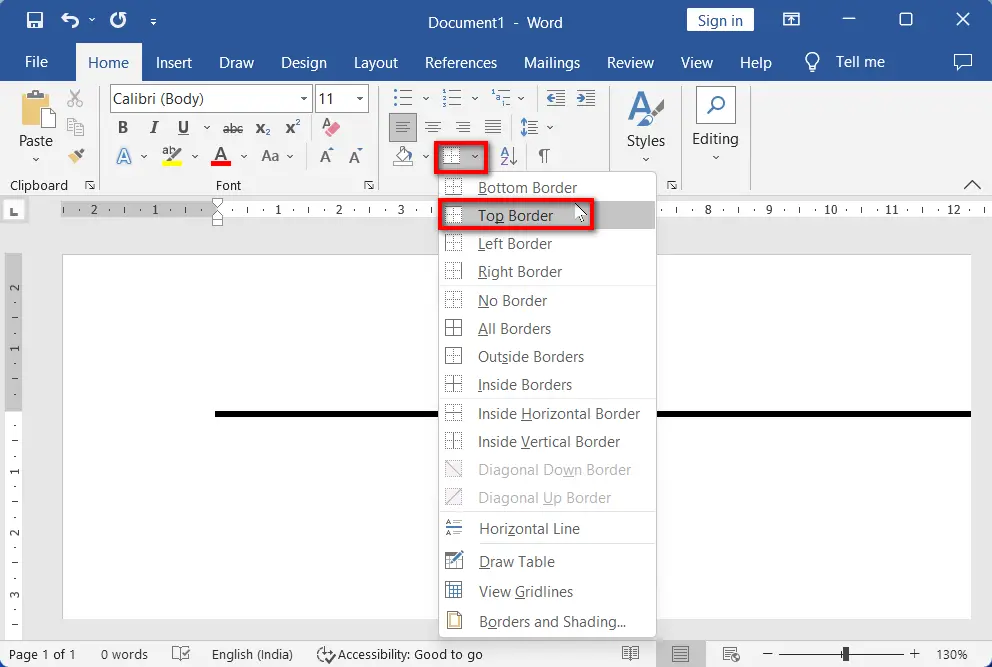
You can create any directional border on a blank document or on a document with text by following the steps below:
- Go to the Paragraph group on the Home tab.
- Click the border drop-down arrow.
- Select the border option that works best for you.
Formatting horizontal lines
After inserting the borders or lines, use the shortcut keys described above. You can change the look of these by using the border options. Follow the steps below.
- Go to the Home Tab in MS Word (In Outlook, go to the Format Text tab), then select the drop-down arrow next to the border icons in the Paragraph group.
- Select Borders and Shading at the bottom of the drop-down menu to launch the dialogue box

- In the Borders and Shading dialog box, select the desired line style that you wish to modify, and then click OK.
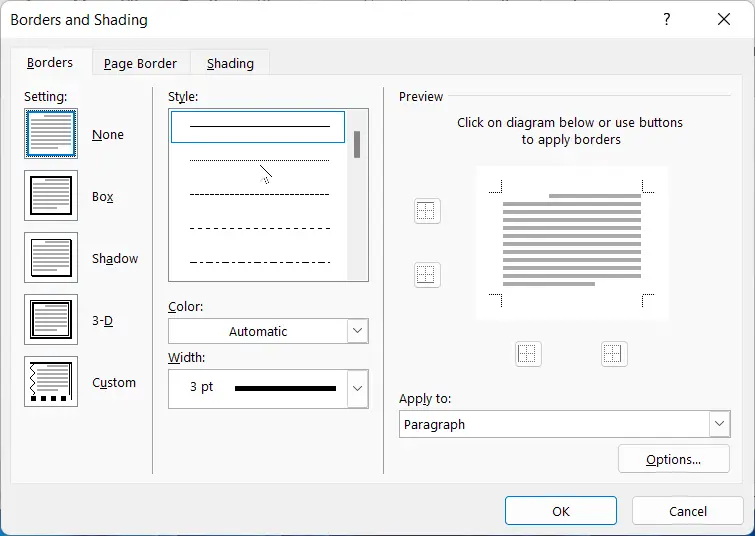
- Once again, click the drop-down arrow in the Borders menu and select “Bottom Borders” to apply the desired style.
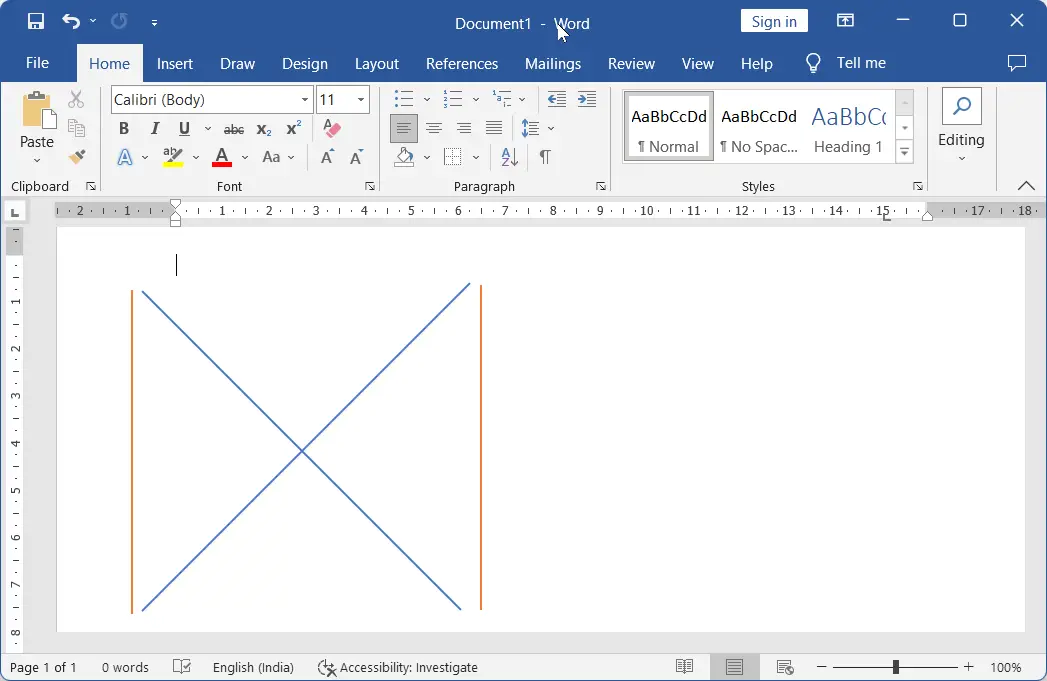
5. Draw Vertical or Horizontal Lines using Shapes
You can draw lines in various directions, including horizontally, vertically, and diagonally, as shown in the screenshot below:
- Go to the “Insert” tab.
- Click on “Shapes” and choose “Line.”
- Press and hold the “Shift” key.
- Click and drag the cursor to draw lines in any direction of your choice.
Video Tutorial
-
Is it possible to draw a vertical line in Word?
Yes, it is possible to draw vertical lines in Microsoft Word.
-
Can lines be added to paragraphs?
Yes, lines can be placed above, below, or between paragraphs using the “Borders and Shading” options under the “Home” tab.
-
Can line style and color be changed?
Yes, after drawing, right-click the line, choose “Format Shape,” and modify color, thickness, and style as desired.
-
How do I ensure precise alignment?
Utilize Word’s gridlines and “Snap to Grid” feature for accurate placement and alignment of lines.
-
Is drawing mode essential for line creation?
No, lines can also be inserted using the “Insert” tab, where predefined line styles are available.
-
Is it possible to create dashed lines?
Yes, you can change the line style to dashed in the formatting options.
-
Can these lines be aligned precisely?
Yes, use alignment guides or grids for precise positioning.