By default, you can’t use the show or hide ink option in Excel, Word, and Ppt. To use the ink annotation you need to add the draw tab to the ribbon, or you can use it directly if your computer has a touch screen.
Ink Annotation in MS Word, Excel and PowerPoint is used to highlight the content or draw something you like. To do so in Excel, Word, and Ppt follow the steps below.
Table of Contents
Show or Hide ink in Excel, Word, and Ppt
To draw, show, hide, or delete ink in excel, Word, and PowerPoint, do the following:
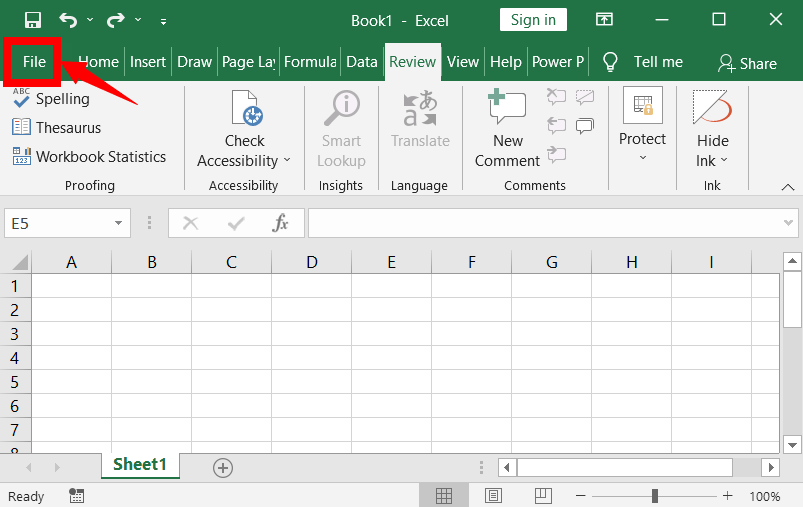
Navigate to the “File” options in MS Word, Excel, or PowerPoint.
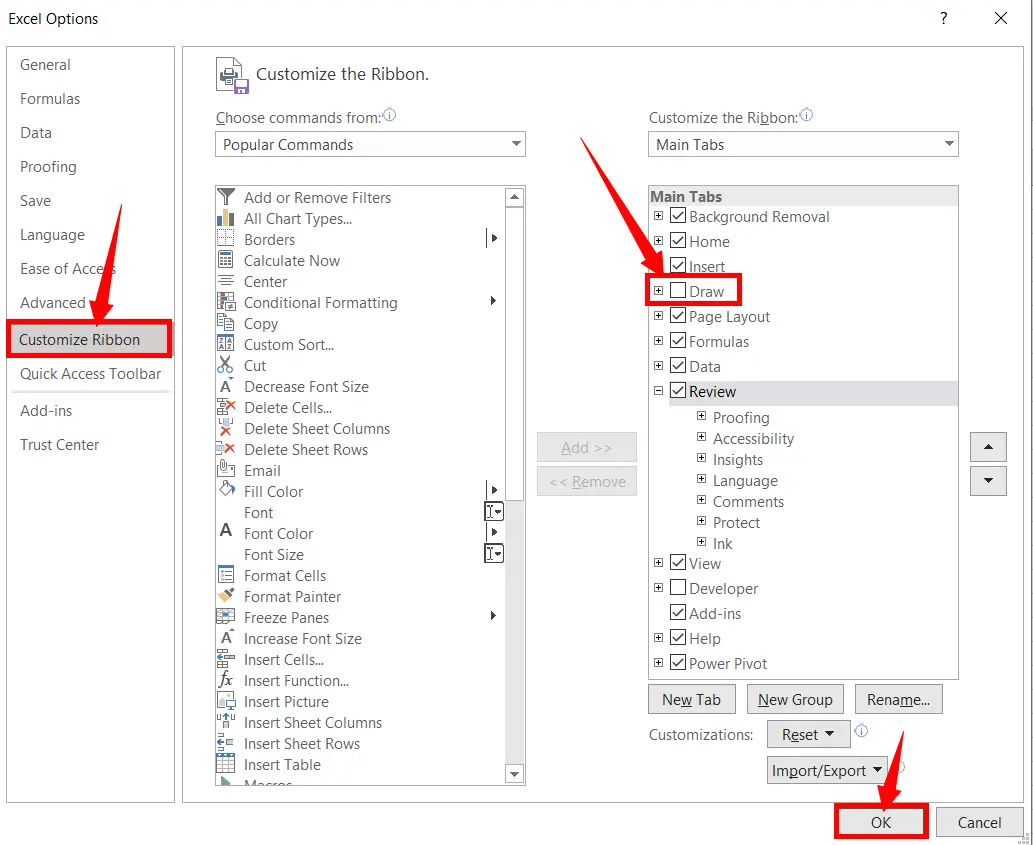
Click “Options” which appears at the bottom of the list as in the picture below (It is to open a dialogue) box.

On the (excel, word, or Ppt options) dialogue box, select the custom ribbon on the left side options, then tick the draw option under main tabs, and then click OK to add a Draw tab.
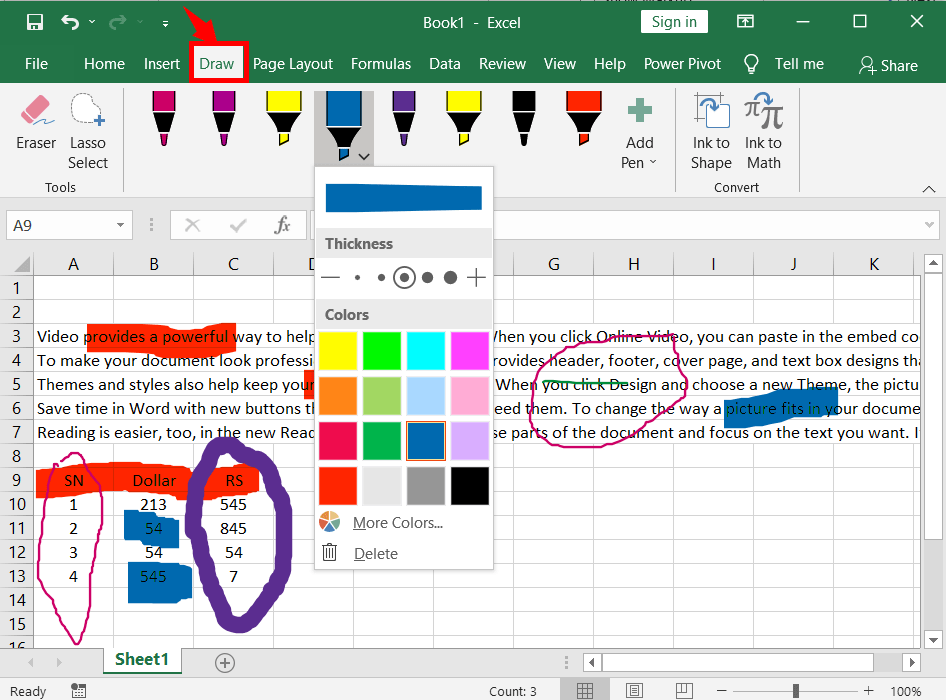
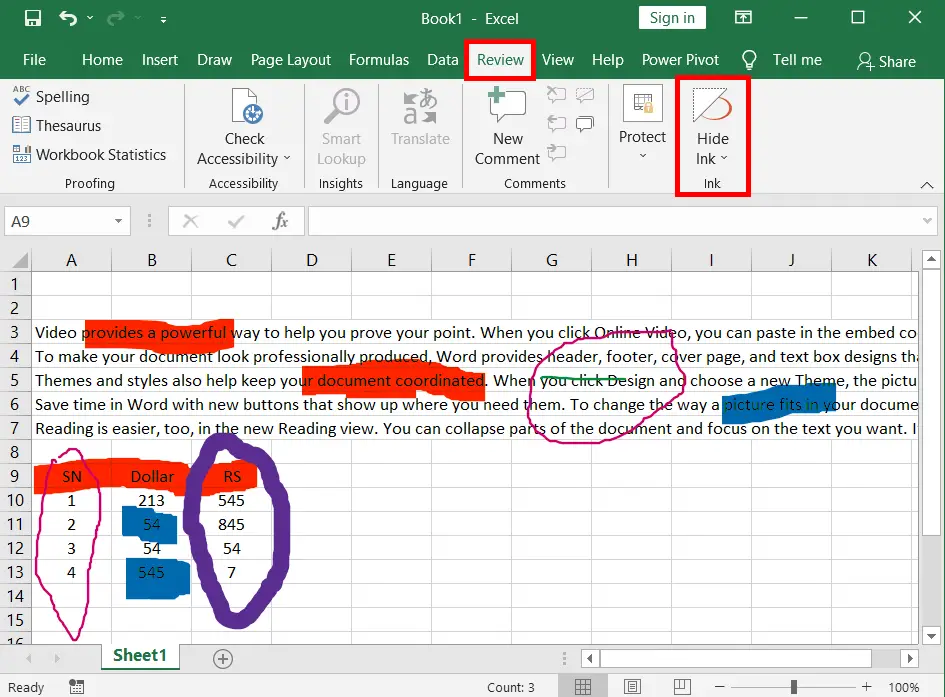
On the Draw tab, select one of the Pens, and then draw what you want as in the picture below.
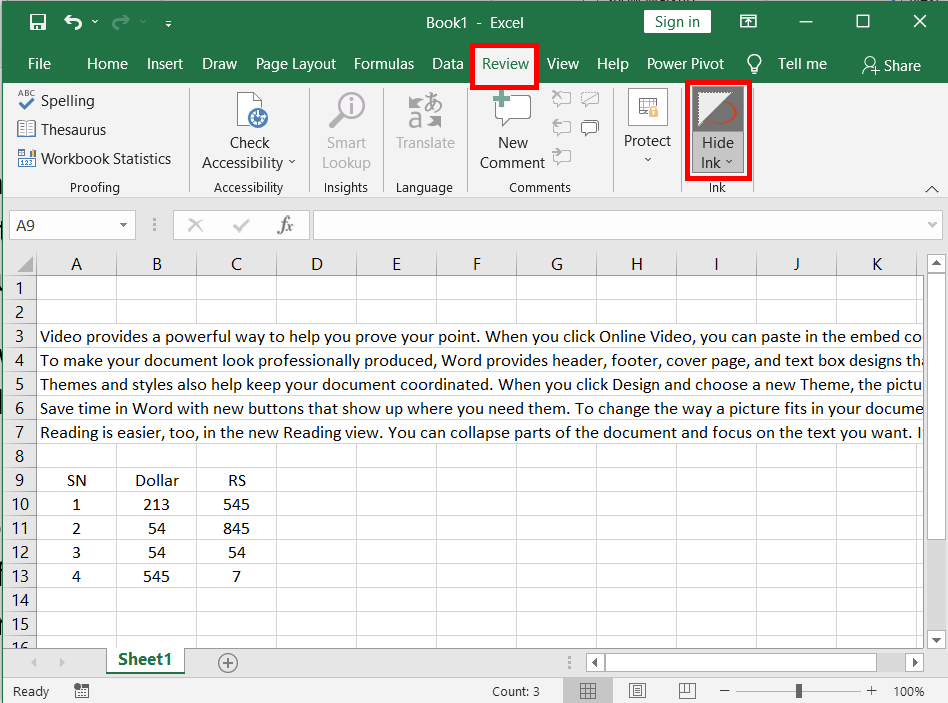
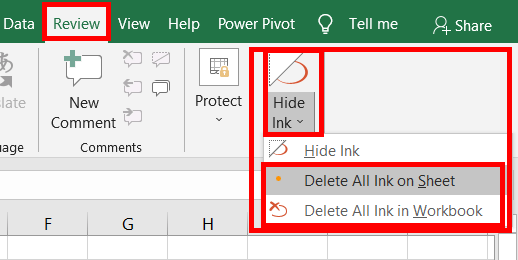
Now switch to the “Review” tab and click “Hide Ink” to hide all the ink annotations that you have drawn. (Or click on the drop-down arrow of the Hide Ink and click its option).
If this icon is highlighted with grey in colour, it means that all the inks you have drawn are hidden.
To show all the drawings, again click hide ink show all. If this icon is not highlighted with grey in colour, it means that all the inks you have drawn are shown.
To delete all ink on the worksheet, “Delete All Ink on Worksheet”
To delete all ink on the work Book, “Delete All Ink on Work Book”.
What are the Benefits of Using Ink Annotations in MS Office?
For example, you might want to show or hide ink to highlight formulas and other text in an ACL workbook. You can also use this feature to highlight important parts of a Word or presentation.
How can I show or hide ink in Excel, Word, and PowerPoint?
To show or hide ink, go to the “Review” tab, click on “Ink” (in Word and PowerPoint) or “Check Accessibility” (in Excel), and then select “Show Ink” or “Hide Ink” as needed.
Is there a way to hide ink permanently for a finalized document or presentation?
Yes, you can hide ink permanently to ensure it’s not visible when sharing or presenting the final version of your file.
Can I hide specific ink annotations or drawings while keeping others visible?
Yes, you can selectively hide or show individual ink annotations or drawings in your document or presentation.
What’s the benefit of hiding ink in Excel, Word, and PowerPoint?
Hiding ink can declutter your document or presentation, making it easier to focus on content or prepare for a clean final presentation.