
Most people do not know that how to remove the header from the second page of a word document.
But before doing it, you need to know some of the quicker guides to remove the header from the second page. And let’s see what they are.
Table of Contents
Remove the Header from the Second Page in Word using Section Breaks:
- Make sure all pages in the document have a header in advance
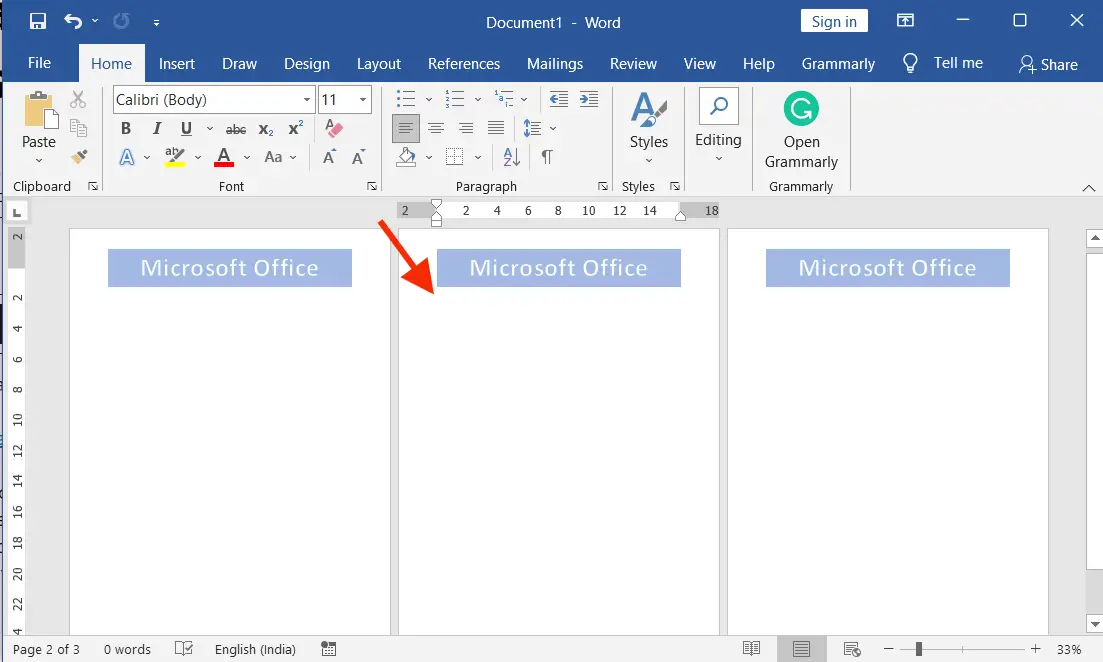
- Click on the text/content beginning of the second page where you want to remove the header
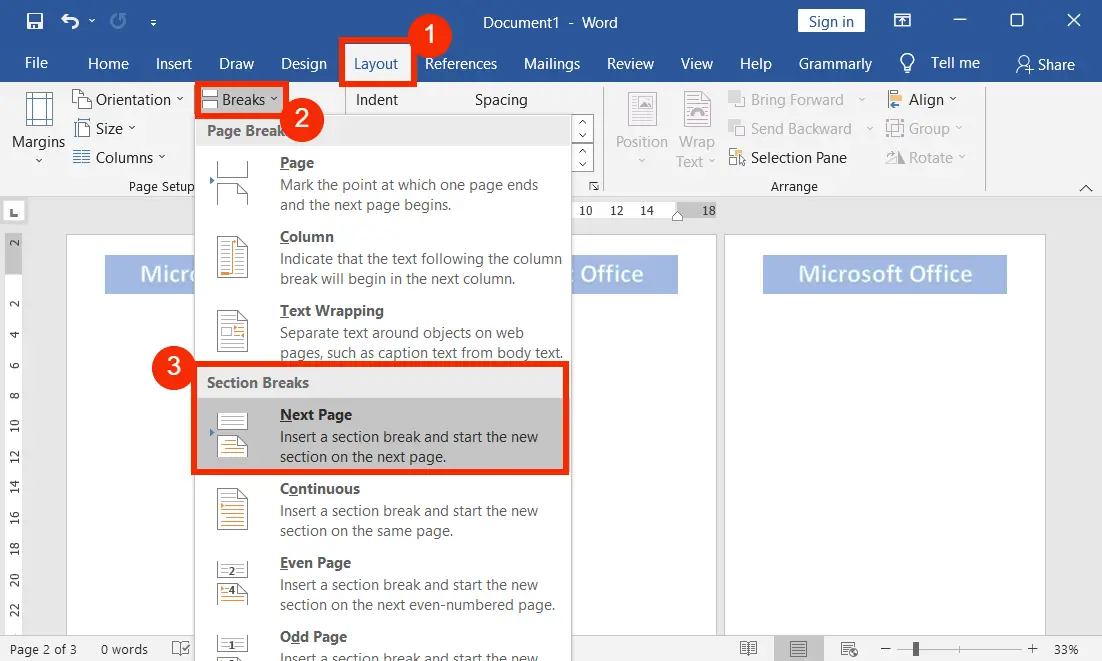
- Click on the “Layout” tab → Breaks → Next Page
- After that click on the text/content beginning of the third page as in the first screenshot.
- Again click on the “Layout” tab → Breaks → Next Page

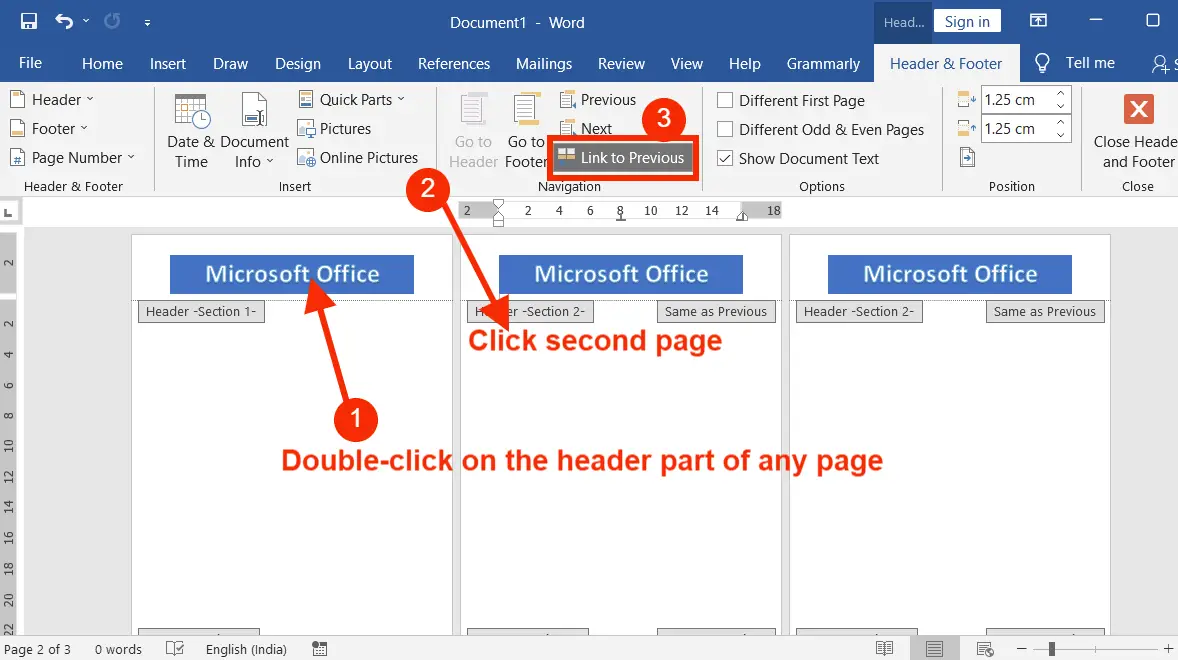
- Now double-click on the top of any page to open the header and footer tools tab
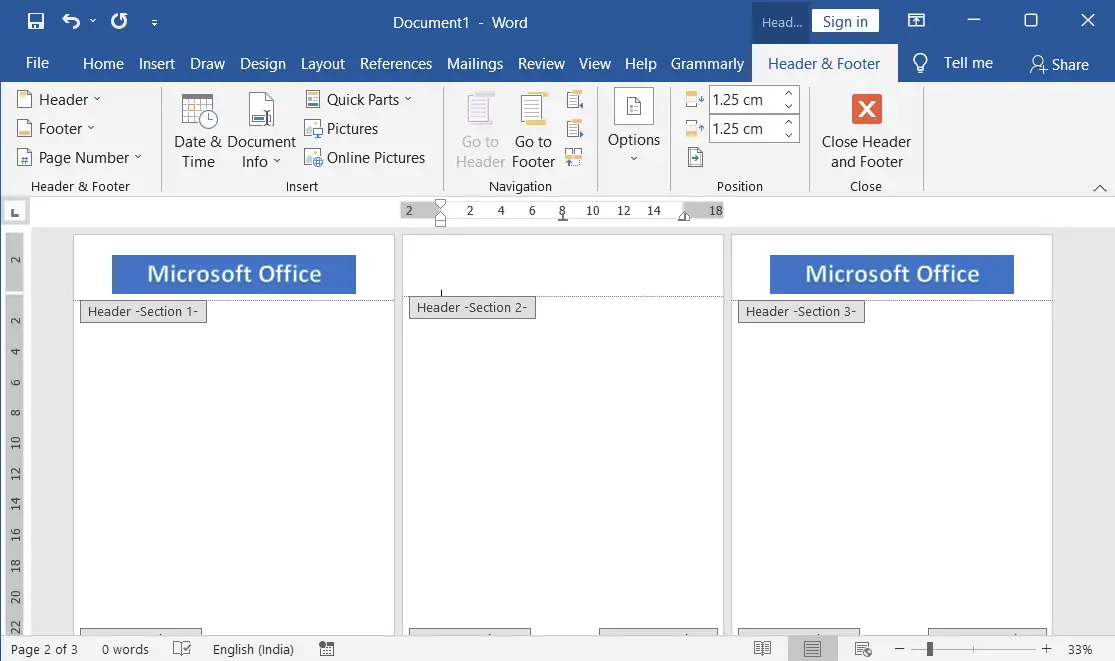
- Click the second page and click the “Link to previous” to turn off it. And do the same on the third page
- Now select the header and press delete to remove the header from the second page.
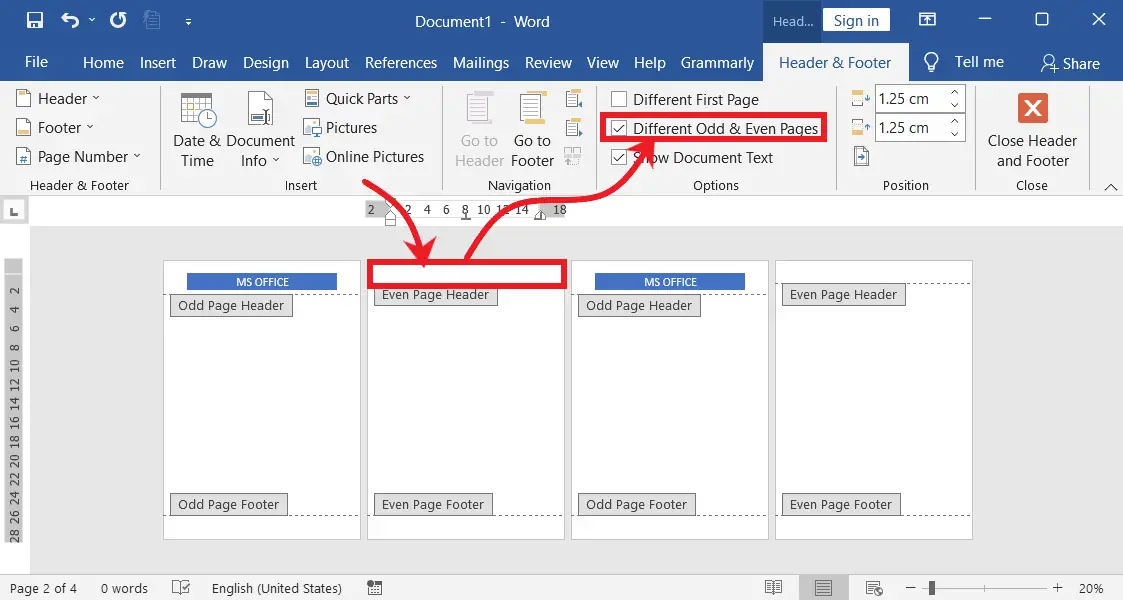
Delete the Header from the Second Page using Different Odd & Even Page Options:
- Double-click on the top of any page to edit the header
- On the header & footer tools checkmark the “Different Odd & Even Pages” to remove even page headers. Since the second page is the even page so its header is also removed.
How to Remove a Header From the Third Page in Microsoft Word:
* Click at the beginning of the third page
* Click “Layout” tab → Breaks → Next Page
* After that click at the beginning of the fourth-page
* Click “Layout” tab → Breaks → Next Page
* Now double-click on the top of any page to open the header and footer tools tab
* Click the third page and click “Link to previous” to turn off it. And do the same on the fourth page.
* Now select the header and press delete to remove the header from the third page.
How to Remove a Header From the Fourth Page in Word:
* Click at the beginning of the fourth page
* Click “Layout” tab → Breaks → Next Page
* After that click at the beginning of the fifth-page
* Click “Layout” tab → Breaks → Next Page
* Now double-click on the top of any page to open the header and footer tools tab
* Click the fourth page and click “Link to previous” to turn off it. And do the same on the fifth page.
* Now select the header and press delete to remove the header from the fourth page.
Is it possible to remove a header from the second page?
Yes. it is possible to remove the page break.
How do I bring back the header if needed after removal?
Double-click the header area on the page where you want to reintroduce it and add/edit the header content.
Does this method work in different versions of Word?
Yes, though there might be slight variations, the concept of using section breaks to control headers is consistent in most versions.
How do you adjust the top margins once the header has been removed on the second page?