In this new world, everyone must learn how to print Word documents, Excel worksheets, and PowerPoint slides. Some of these may or may not be familiar to us, but not all sophisticated settings are known to most people. You can easily print any document using these basic and advanced techniques.
Table of Contents
How to Print a Word Document
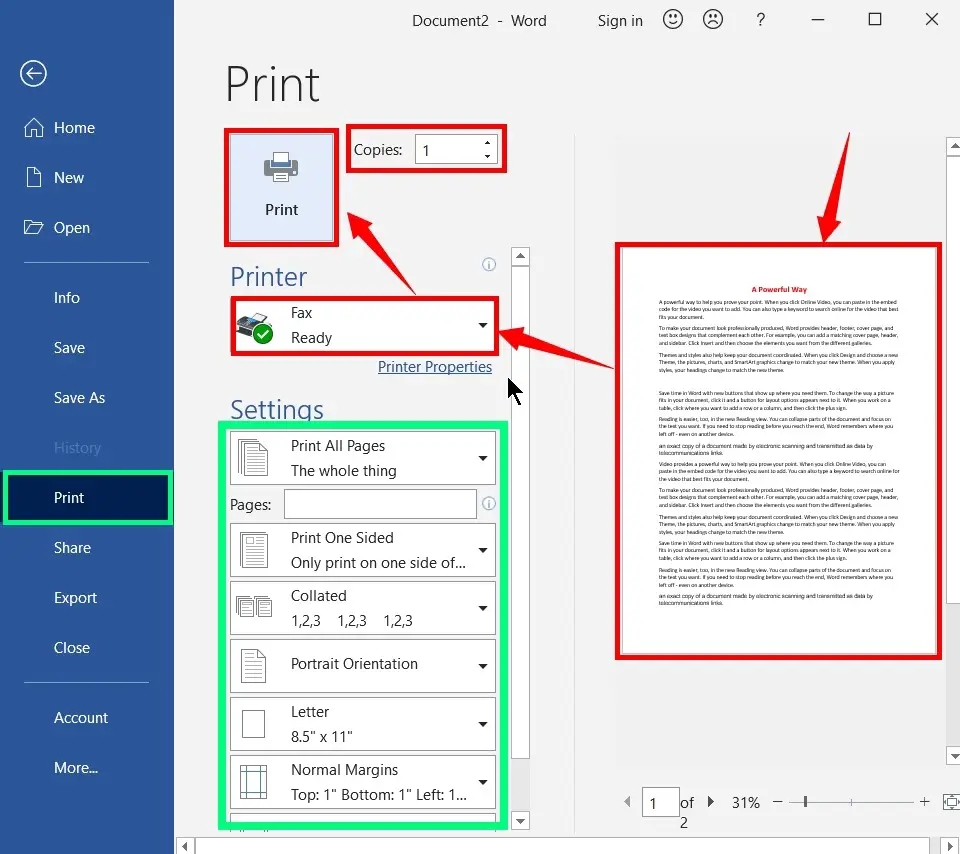
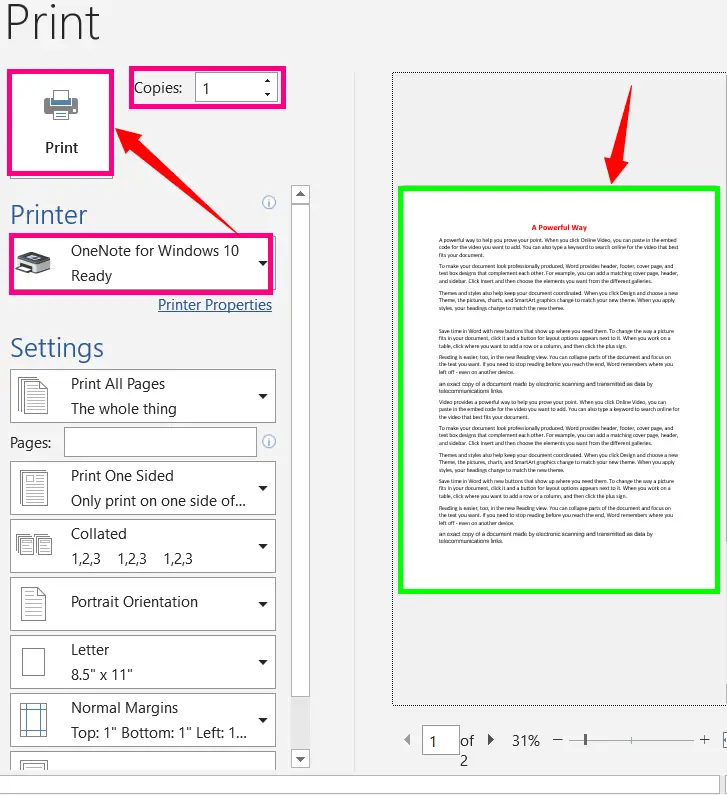
To print a document or to open a Word print preview screen, press Ctrl + P, or you can manually open the dialogue box by navigating the “File” menu and selecting this option.
Print Preview:
To see a print preview of the word before printing the document, press Ctrl + P.
Select a printer:
Select the printer on which the document will be printed. To enable this option, you must install the driver software that has been provided by the company itself.
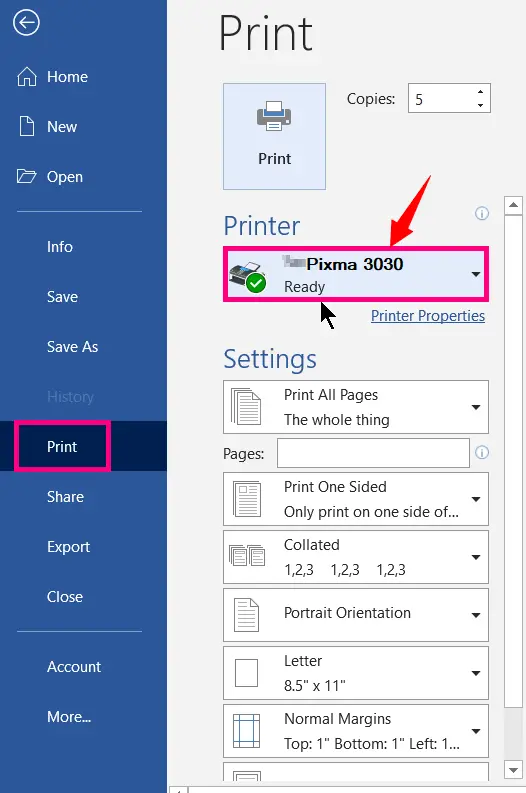
On the dialogue box, under the printer, click the drop-down arrow and select the printer’s name on which you want to print the desired document.
Change Print Settings / Options:
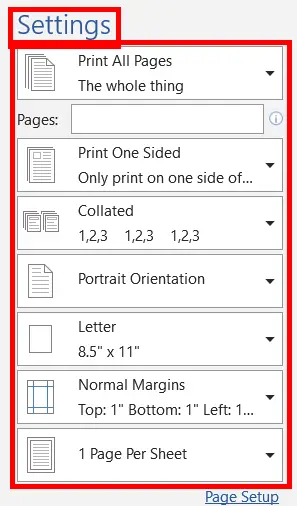
The print setting is a combination of options such as a margin, orientation, collated or uncoiled, etc. These are explained below.
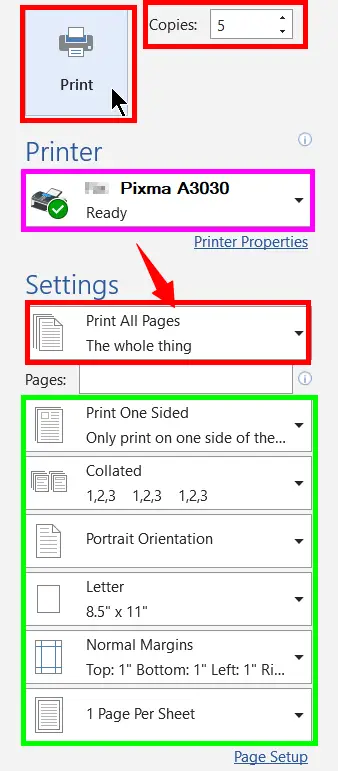
Print All Pages:
When you select this option, it prints all the pages (the whole thing) of your document.
Steps:
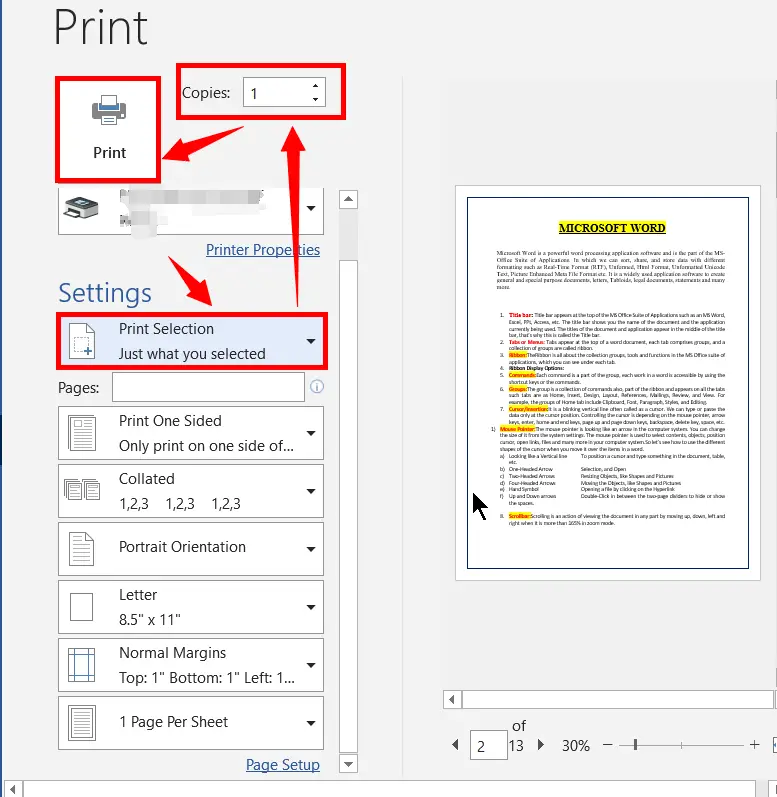
Print Selection:
Print only the selected block of contents of your pages in the word document.
Steps:
Print Current Page in Word:
This option is useful to print the present page that is visible on the right side of the print dialogue box.
Custom Print:
Print any part of the document, or any number of pages in your word document by entering the page numbers below the current print option on the dialogue box.
For example, if you want to print only selected pages, then enter the page numbers one by one followed by the commas like 1,3,8,12,26. And if you want to print the ranges of the pages, for example from 5 to 20, enter the page numbers followed by a hyphen like 5-20,30-60. You can also print the selected pages and range of pages as 1,3,8,12,5-20.
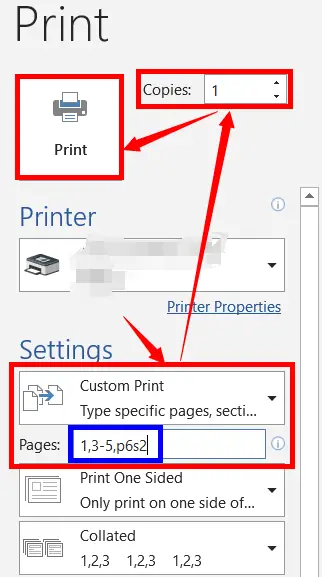
Similarly, you can also print the specific sections in the Word document. For example, assume that a material contains 10 pages, and each page contains 6 paragraphs.
In this material, on the 2nd and 3rd page, if you want to print the 2nd, 3rd and 4th paragraphs, enter p2s2, p2s3, p2s4, p3s2, p3s3, p3s4 under the custom print text box. Lastly, select the number of copies you want, then click print.
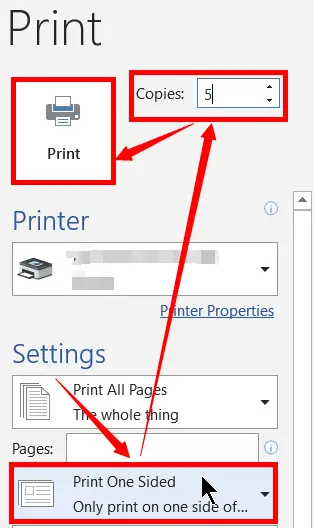
Print One-Sided:
Useful to print only one side of the pages in your document.
Print One-Sided Word Document:
Manually Print on Both Sides:
This setting doesn’t work on all printers. Some don’t support both sides of paper printing and some support it. To manually do so in a word document, do the following.
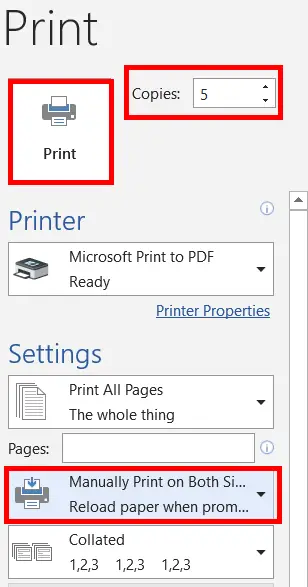
Note: Reload the paper when prompted to print the second side if your printer doesn’t support both sides’ auto printing.
Collated and Uncollated:
Collated Printing:

Reprint all the pages in chronological order based on the number of copies you have set. For example, if you want to print a 20-page document in 10 copies, your printer will print 1 to 20 pages in order and start from scratch, so a total of 10 copies will print.
Uncollated Printing:
Reprint 1st-page then the 2nd page, 3rd, and all pages. In this way, reprints one by one page based on the number of copies you have set. For example, if you want to print a 20-page document in 10 copies, your printer prints the 1st page in 10 copies and then prints the 2nd, 3rd, 4th, and all pages as on the first page.
Print Portrait Orientation:
The portrait is a default page orientation. In this orientation, the measurement of the height is greater than the width. A portrait-oriented layout is highly used.
Steps:
Print Landscape Orientation:
The landscape is not a default page orientation. In this orientation, the measurement of the height is less than the width. Landscape-oriented printing is used for special purposes printing.
Steps to Print Landscape Orientation:
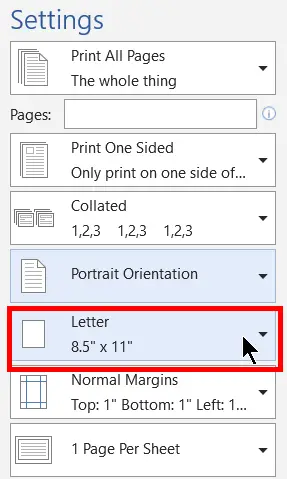
Change Document Size:
Paper size is one of the important matters. The default size is the letter and its measurement in inches is 8.5*11. It is one of the highly used sizes and fits mostly on all printers. A4 paper size is also a regularly used size. For printing, you can choose any size you want to be based on your requirement.
Print with Selected Size:
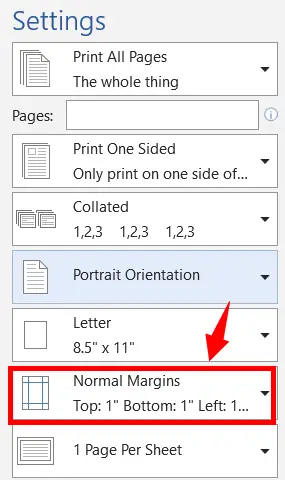
Change Margins:
Before taking a print, there is no need to check the margins. By default, its print size is universally accepted. It occupies 1 inch on all sides, which is normal.
For your best convenience, you can change the margins on the layout tab in the page size group, or you can change the setting.
Steps:
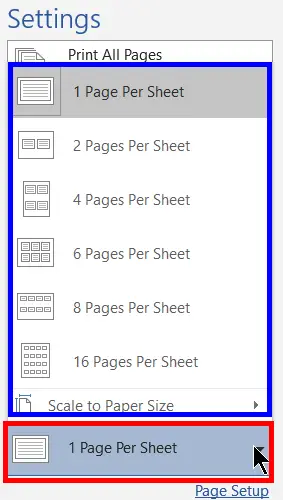
Change Pages Per Sheet:
This option is useful when we want to save more paper (Save papers, save trees). You can print up to 16 pages on one sheet or page.
Steps:
Print Odd and Even Pages:
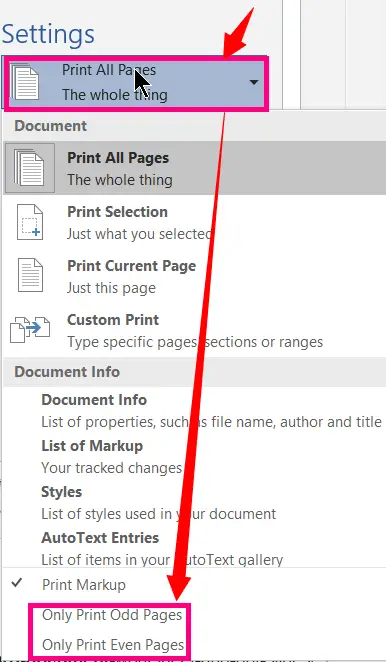
When your printer doesn’t support both sides of page printing, then odd and even page printing is useful. Sometimes we feel that these are unnecessary. Printing these pages is especially useful when your printer does not support a both-sided option.
After printing the odd papers on one side, reload the same paper again on the backside and select “Only Print Odd Pages” by clicking the drop-down arrow of the print all pages under “Settings”.
Print Copies:
Choose the number of copies you want by clicking the drop-down or drop-up arrows of the copies.
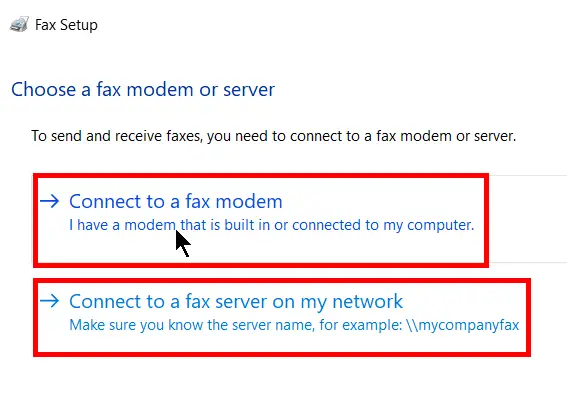
How to Send a FAX:
The Full Facsimile is abbreviated as FAX, also called Telefax. FAX is an exact copy of a document created by electronic scanning and transmitted and reproduced of a document by telecommunications links or radio waves. To connect and send a Fax you must have a pre-installed Fax modem or server.
Steps to Send a Fax:
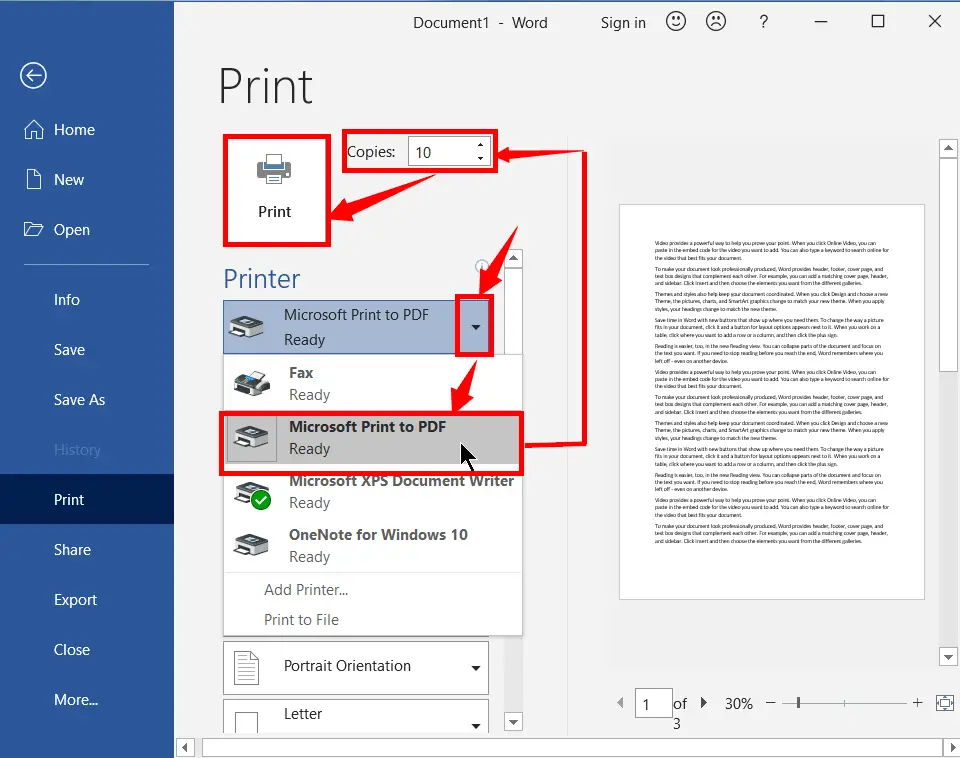
Print Microsoft Word to PDF:
When you set everything for printing, in case your printer doesn’t work, you can save the document to PDF as in the following step.
Steps:
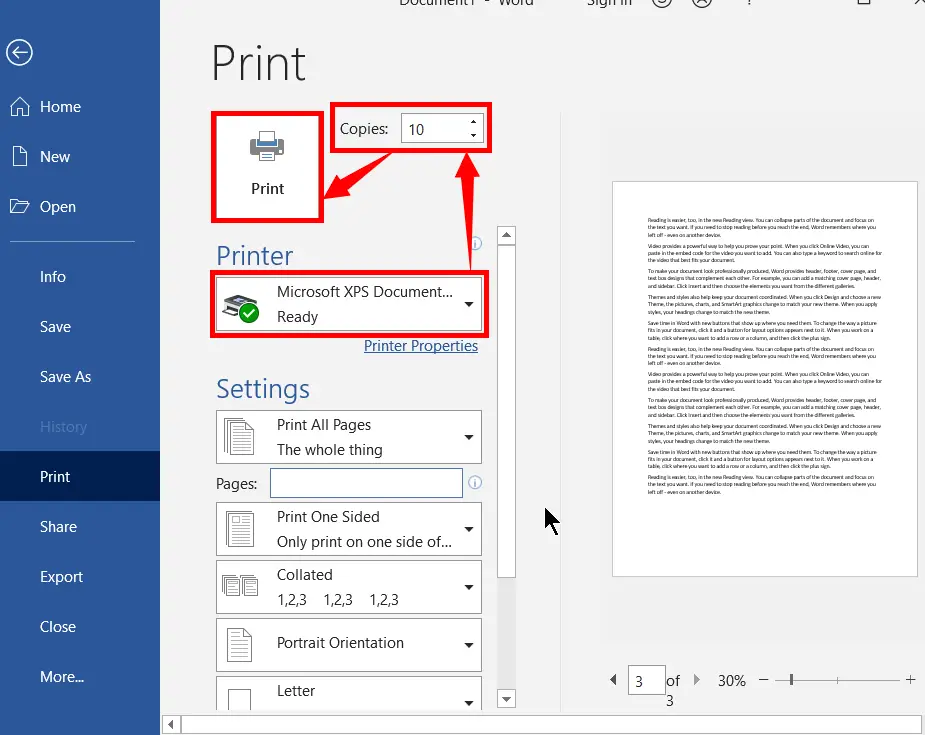
Microsoft XPS Document Writer:
In case your printer doesn’t work, you can save a word document as a Microsoft XPS Document Writer as given in the following steps.
Steps to Save a Microsoft XPS Document:
OneNote for Windows 10:
Do you have OneNote Account? If yes, you can save a printable document with settings to OneNote. So that you can save and edit online anywhere else if you have a Microsoft Account. If not, you can directly save it to OneNote and add extra features and then print the converted OneNote files on your computer.
Properties
Printer Properties are the layout of the document. Select the landscape or portrait layout that you want.
Advanced Print Properties
This is used to change the paper size you want.
Print Without Comments
Print with Comments
To do so with comments, make sure your word document has some comments. Then print the document.
Video Tutorial
What is the shortcut to printing a Word Document?
To print a document press Ctrl + P, or you can manually open the dialogue box by navigating the file menu and selecting the print option. After changing the print options, click print.
The Document Could not be Printed: Why?
When you print a word document or pdf document, they may not print due to old drivers or incorrect software usage, or any other technical problem.
What is Print Preview in Word Document?
To see these options in word, navigate to the File menu, then click Print, or press Control + P.
Can we Print a Word File Without Comments?
Yes
How to print with comments?
To do so a word document with comments, make sure your word document has some comments. Then print the document.
Why can’t I print my paper?
Having corrupted graphics or non-compatible fonts can cause errors when printing or corrupted files or documents in Word. Occasionally, there may be a computer driver or software error.
How do I print a page from my computer?
By pressing Ctrl+P or selecting the print option from any program on your computer.