In MS Word, the View Gridlines of a Table feature allows you to display the gridlines of a table without applying any visible borders. T
This is a useful tool for working with tables, as it provides a clear visual guide for the structure and layout of the table, even when there are no visible borders set.
Gridlines help you align and organize data more effectively, making it easier to work with the table contents.
By using View Gridlines, you can keep track of cell boundaries and table layout while still maintaining a clean, borderless appearance.
This feature is especially helpful when you want to keep your table visually simple for the final presentation while maintaining a well-structured document for editing and data manipulation.
When you insert a table, it initially appears with default borders. If you choose to apply the “No Border” option to the table, the borders will disappear. In this case, the table will need gridlines for a clearer appearance.
Table of Contents
View Gridlines of a Table
To work with gridlines in a table, follow these steps:
- Insert the table: Go to the “Insert” tab in your document software and choose “Table.” Insert the table with the desired number of rows and columns.
- Access the Table Tools: Once you have inserted the table, the “Table Tools Design” and “Layout” tabs should open automatically.
- Select the entire table. Click the four-headed arrow icon at the top left corner of the table. This will select the entire table.
- Navigate to the “Table Design” tab. Make sure you are in the “Table Design” tab.
- Click on “Borders”: Look for the “Borders” button in the “Table Design” tab and click on it.
From here, you can choose the specific border settings you want for your table. For example, you can select options such as “All Borders,” “Outside Borders,” “Inside Borders,” or even “No Border” depending on how you want the table to look. Adjusting the border settings will help enhance the visual appearance and structure of your table.
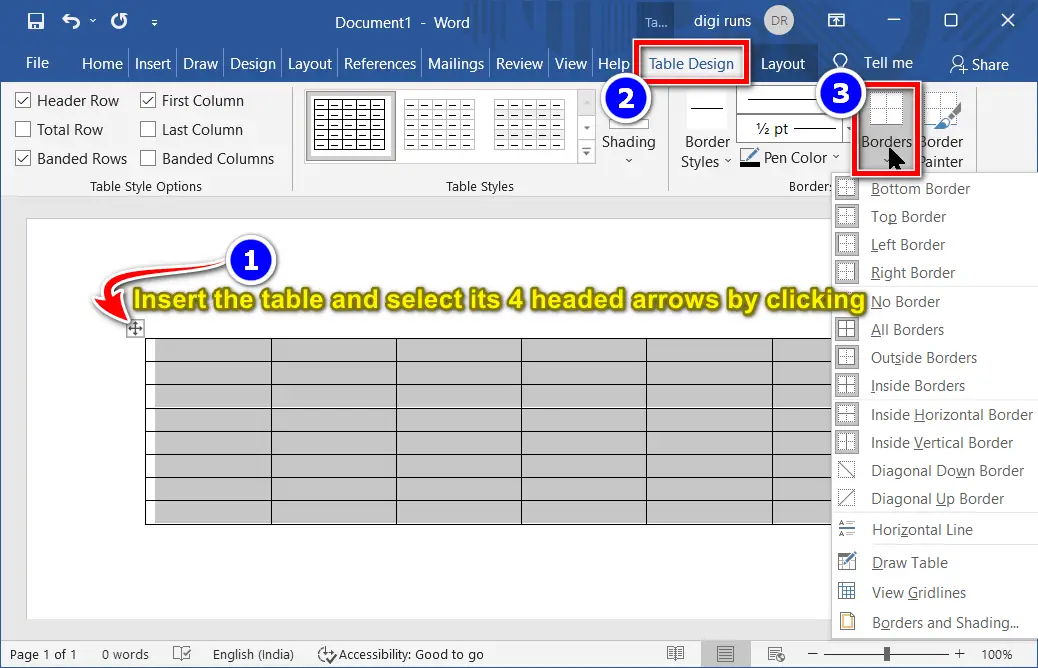
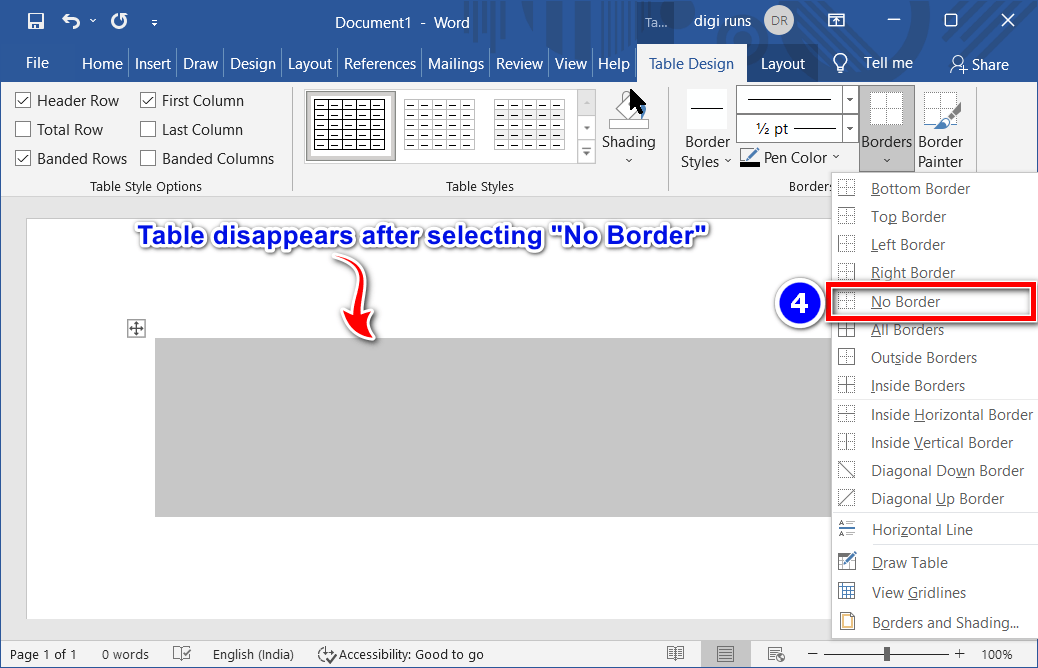
- Select “No Border”: In the Borders menu, locate and select the “No Border” option.
By choosing “No Border,” the table borders will automatically disappear. This will remove any visible lines around the table cells, leaving you with a clean, unbordered table appearance.
- After you’ve selected the “No Border” option and the table borders have disappeared, you can view the gridlines of the table by following these steps:
- Hover over the table: Move your mouse pointer over the area where the table is located. Although the borders may not be visible, the table itself is still there.
- Find the four-headed arrow: When you hover over the table, a four-headed arrow icon should appear at the top left corner of the table.
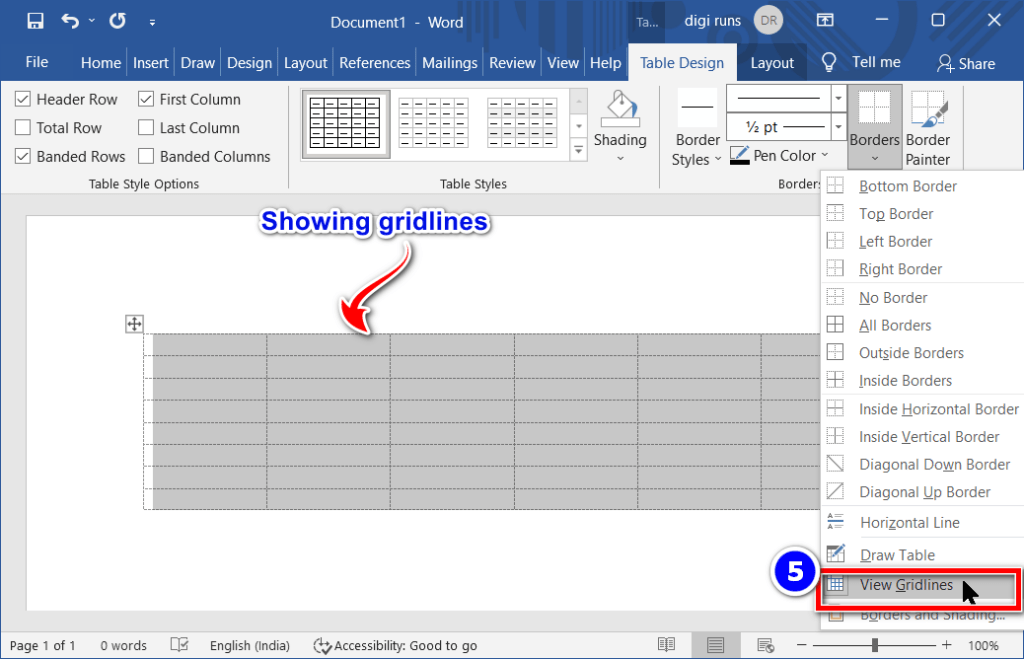
- Click on the four-headed arrow: Click on the four-headed arrow to select the entire table.
- Go to the “Design” tab. Ensure you are in the “Design” tab, which can be found in the toolbar.
- Locate the “Borders” group: In the “Design” tab, find the “Borders” group.
- Click on “Borders.” In the “Borders” group, click on the “Borders” button.
- Select “View Gridlines”: From the drop-down menu, select “View Gridlines.”
After selecting “View Gridlines,” the gridlines of the table will become visible, helping you to better see the structure and layout of the table.
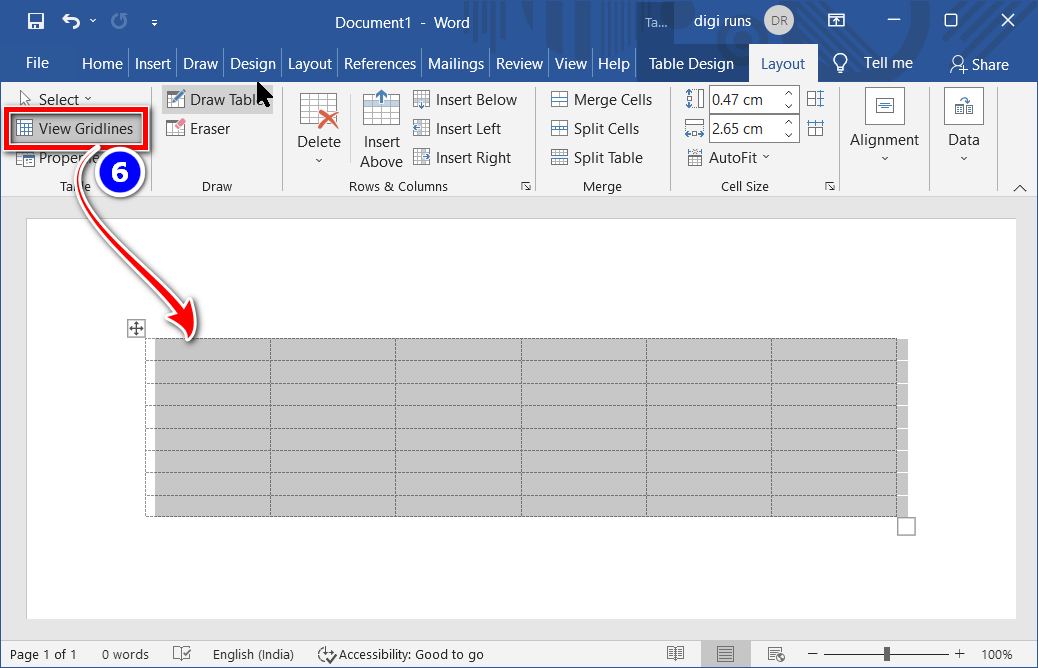
Another way to show the gridlines of a table is by using the “Layout” tab in the “Table Tools” section. Follow these steps:
- Go to the Table Tools Layout tab: First, make sure you are in the “Table Tools Layout” tab. You can access it by selecting the table or placing your cursor inside it.
- Select “View Gridlines”: In the “Layout” tab, look for the “View Gridlines” button in the ribbon.
- Click on “View Gridlines.” Click the “View Gridlines” button to toggle the gridlines on.
Once you select the “View Gridlines” option, the gridlines of the table will appear, allowing you to clearly see the structure and layout of the table.
A Video Tutorial
What is hiding or showing the gridlines of a table in Word?
Sometimes an accidentally deleted table may disappear. In that case, we have to apply either the entire table or the table gridlines.
What are the gridlines of a table in MS Word?
A series of numbered horizontal and vertical lines that divide the table into squares to form a grid are called gridlines.