Making a picture Watermarking in Word is the easiest process. Inserting one is the same as inserting a text watermark, with a slight difference.
In other words, in Microsoft Word, A picture watermark is a type of visual feature that is added to a document to signify ownership or to prevent unlawful use or distribution.
It is a faint image or text that appears in the background of the document and is typically repeated throughout the page.
Picture watermarks can be logos, autographs, or any other image or text that represents the creator of the document.
Table of Contents
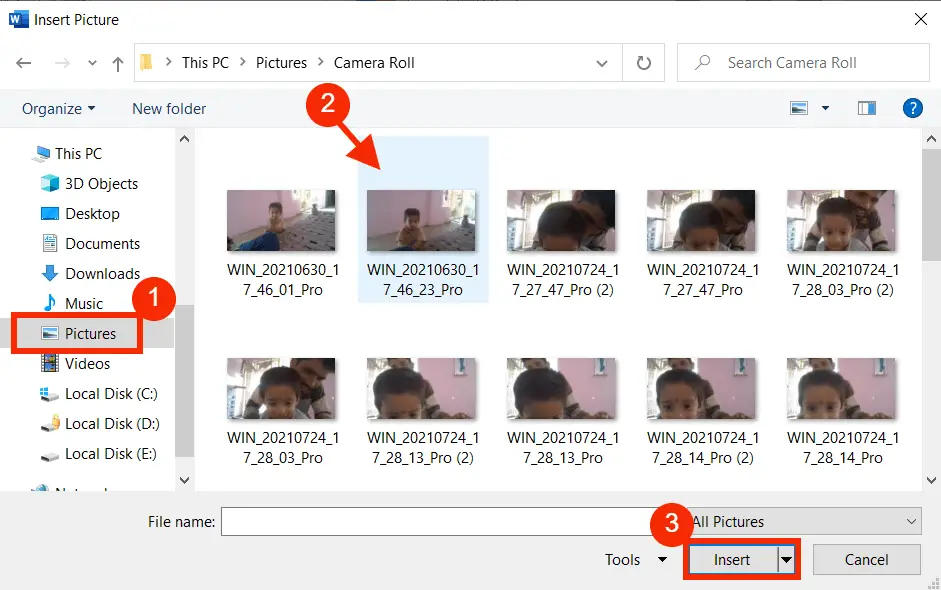
How to Insert Picture Watermark in Word
Click here to learn 2 Ways to Remove Watermark in Word (Including DRAFT)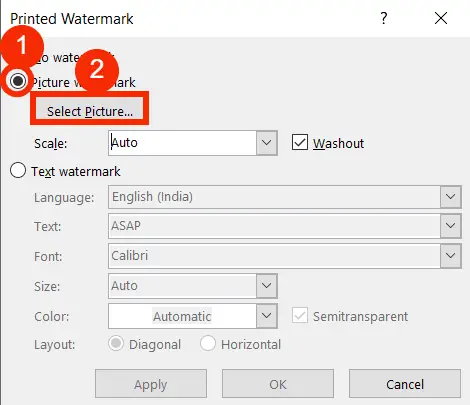
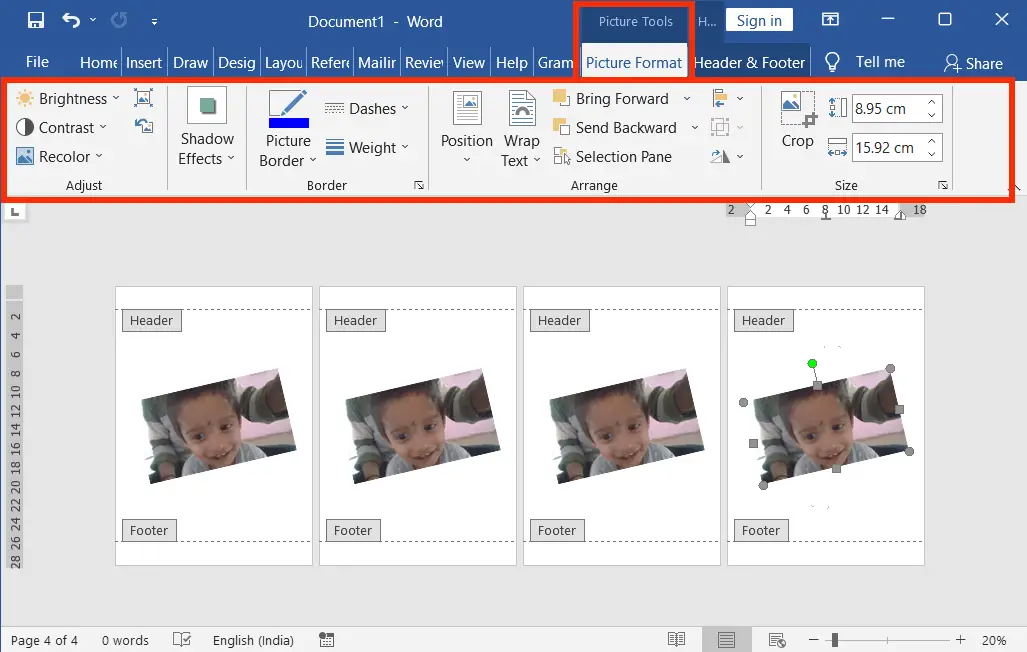
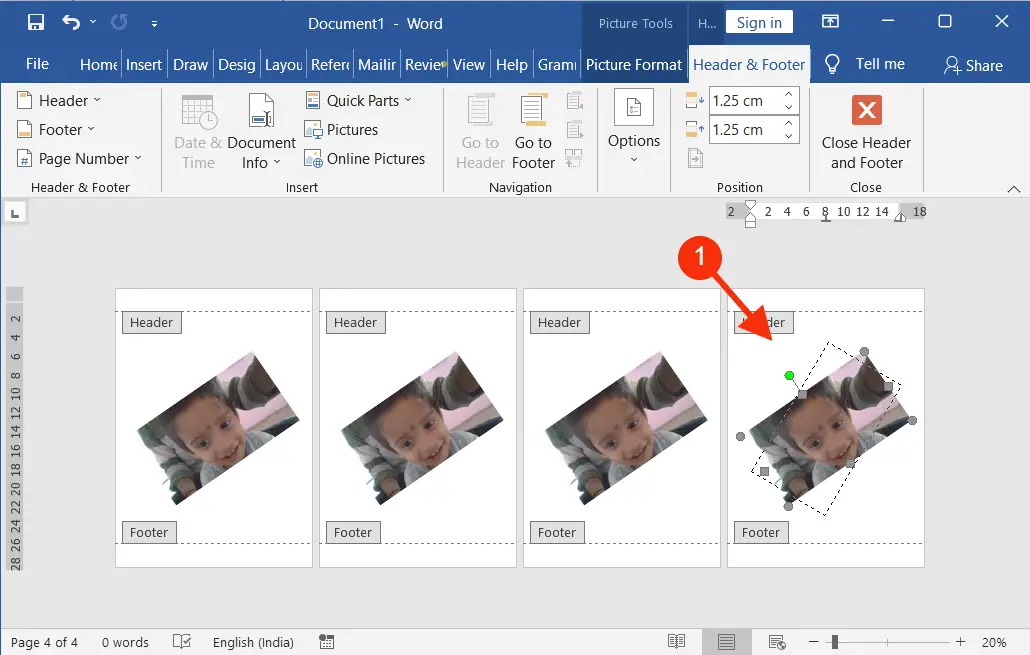
Resizing and Rotating an Image Watermark:
Resizing:

Rotating:
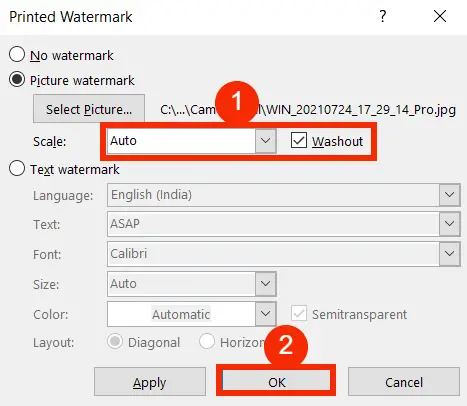
Formatting Picture Watermark:
To Format the Watermark, do the following:
How can the Picture Watermark be adjusted?
Picture watermarks in Word can be adjusted by adjusting the size, position, transparency, and orientation of the image or text.
What is the benefit of using a Picture the Watermark?
It is often used to safeguard intellectual property and to provide a professional touch to documents in legal, business, and artistic situations.
What is a Picture Watermark?
A picture watermark is a transparent image used to protect or claim something described in a document.
How do I insert a picture watermark in Word?
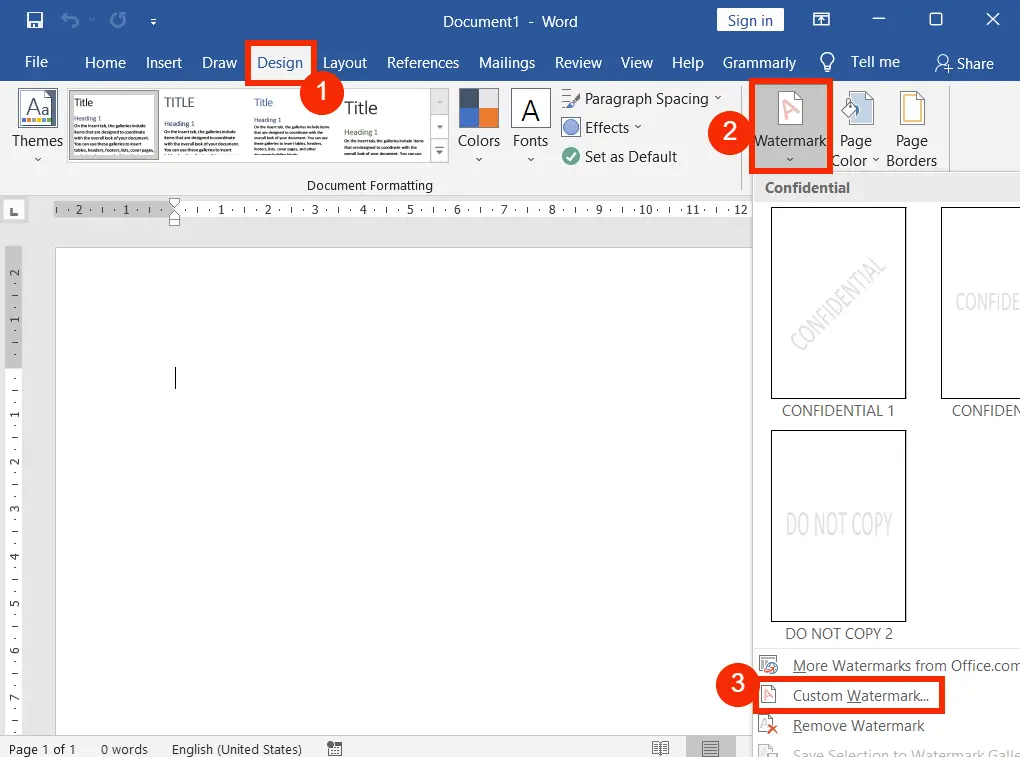
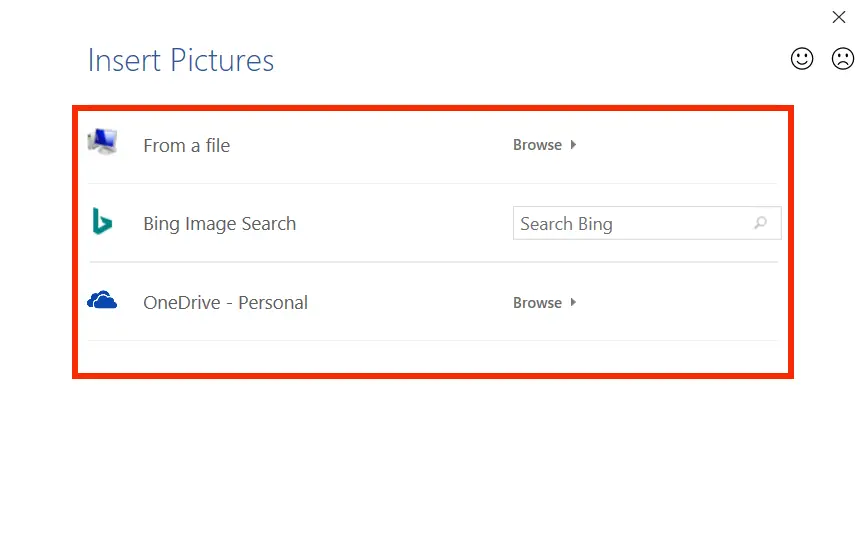
To insert a picture watermark in Word, go to the “Design” tab, select “Watermark,” and choose “Custom Watermark.” Then, click “Picture watermark” and browse for your image.
Can I adjust the transparency of a picture watermark in Word?
Yes, you can adjust the transparency of a picture watermark in Word by changing the “Washout” option when inserting the watermark.
What should be the ideal image format for a picture watermark in Word?
JPEG or PNG formats are recommended for picture watermarks in Word for optimal compatibility and quality.
How can I remove a picture watermark from a Word document?
To remove a picture watermark, go to the “Design” tab, select “Watermark,” and choose “Remove Watermark.”
Can I resize or reposition a picture watermark in Word?
Yes, you can resize and reposition a picture watermark by clicking on it and dragging the handles to adjust size and position.