Giving full, partial, or no permission to edit the content of a particular range in a worksheet and protecting the rest of the worksheet completely with a password is called Allow Edit Ranges.
If you want to set a password for the entire worksheet and also give a password to a range of your choice without editing, You can give the password to any user you trust to make changes in the Excel spreadsheet.
Table of Contents
2 Ways to Allow Edit Ranges in Excel
1. Allow Users to Edit
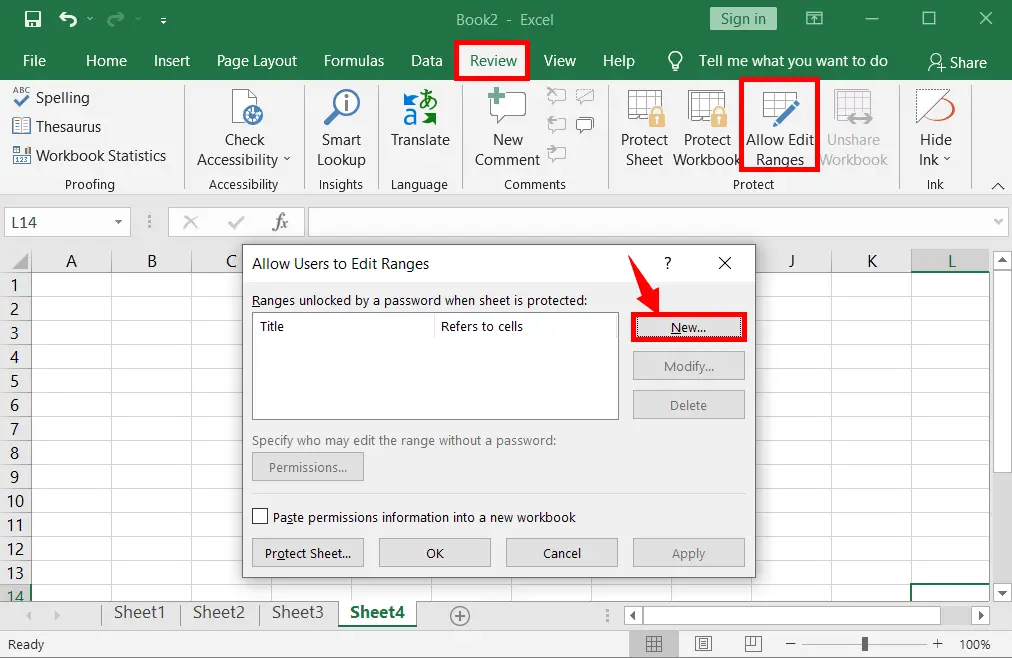
On the “Review” tab, in the Protect group, click “Allow Edit Ranges” to open a dialogue box
Then click “New” on the dialogue box

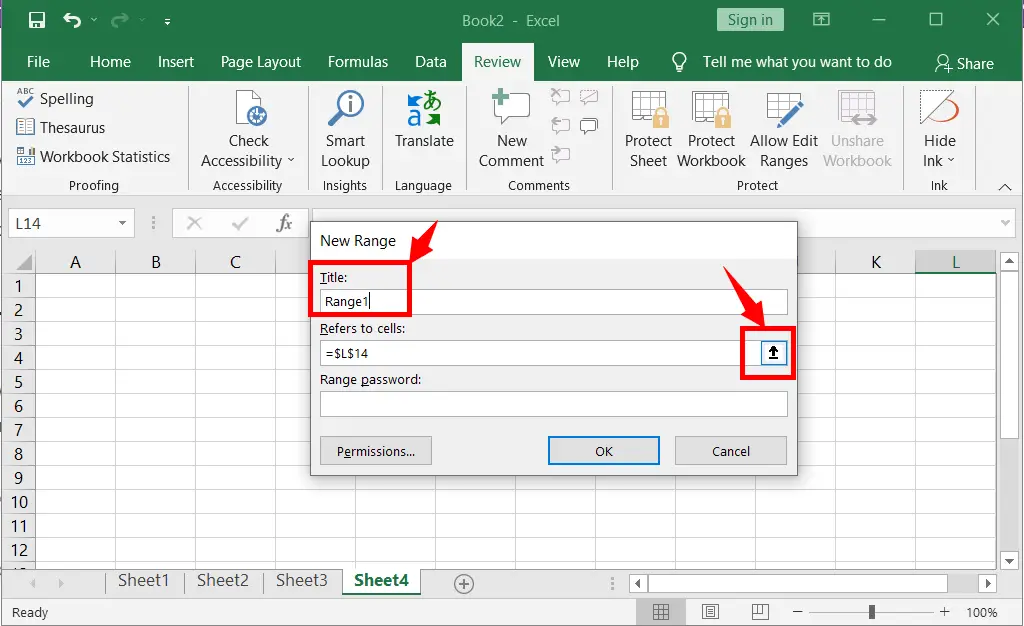
Now type the range title in the “Title” box and click the up arrow of the “Refers to cells” as in the picture below
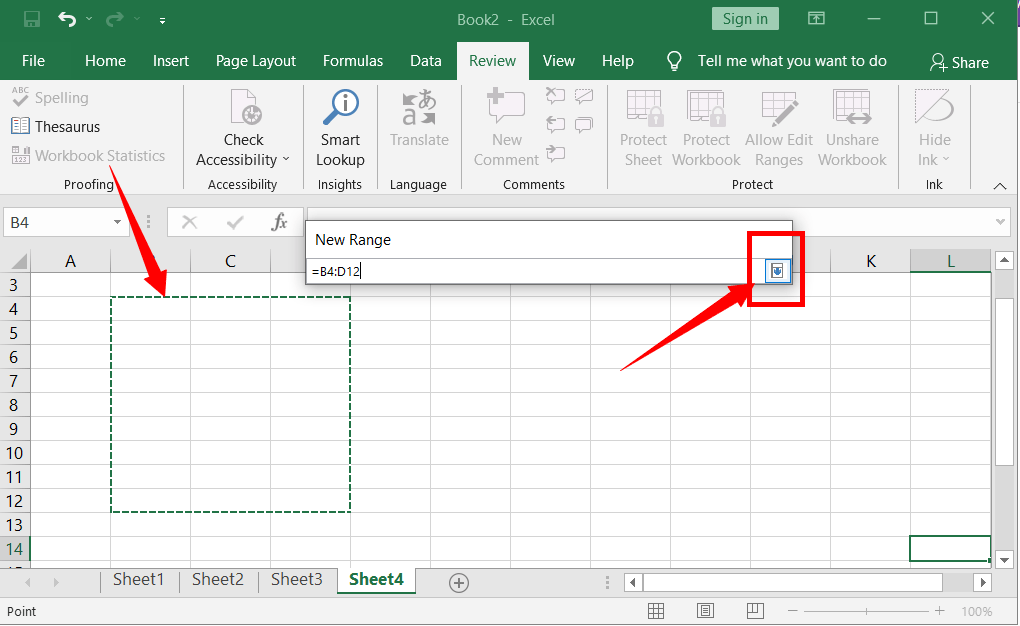
Select the new range and click the down arrow
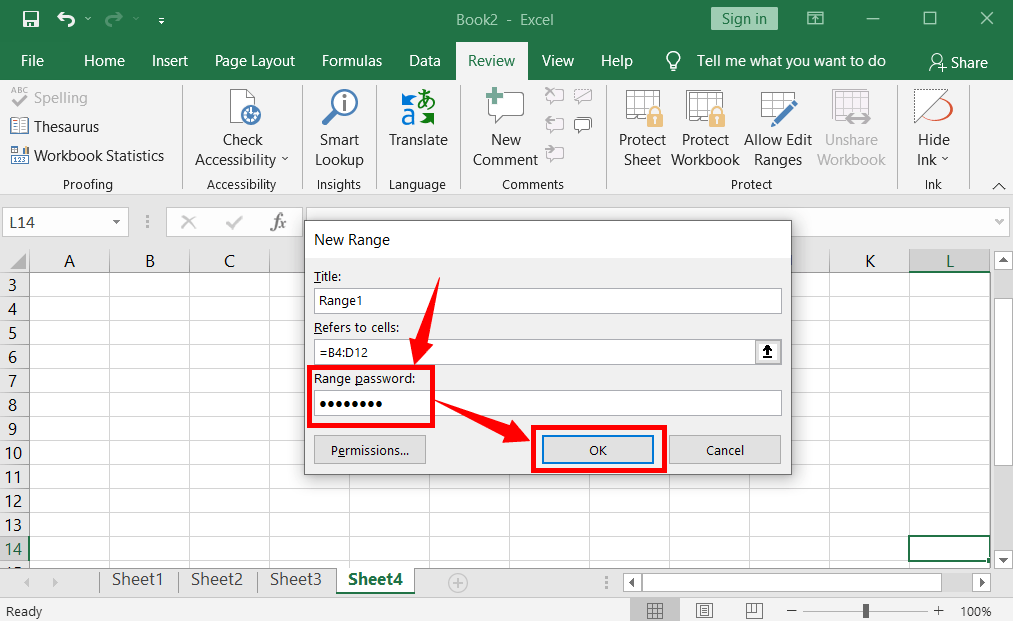
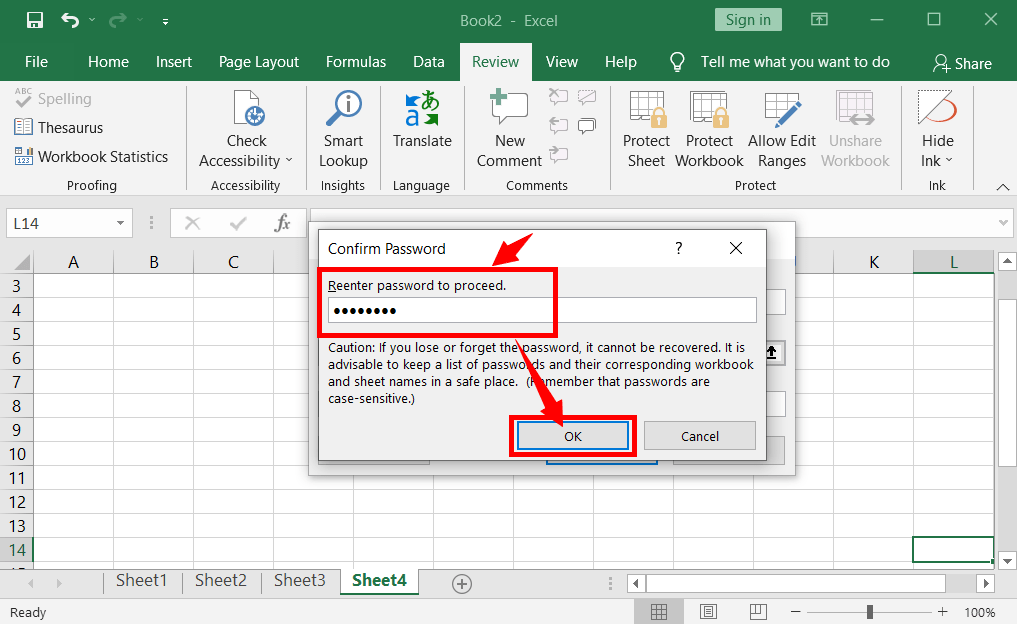
Now type the range password in the Range password box and click OK (When you click OK, a confirmation password dialogue box will open)
Again reenter the password to confirm and click OK
If you want to protect or allow editing another range click on the “New” and follow the same steps explained above
If you want to modify any range that you have protected by password, click “Modify” and change the password and range name
If you want to delete any range that you have protected by password, click “Delete”
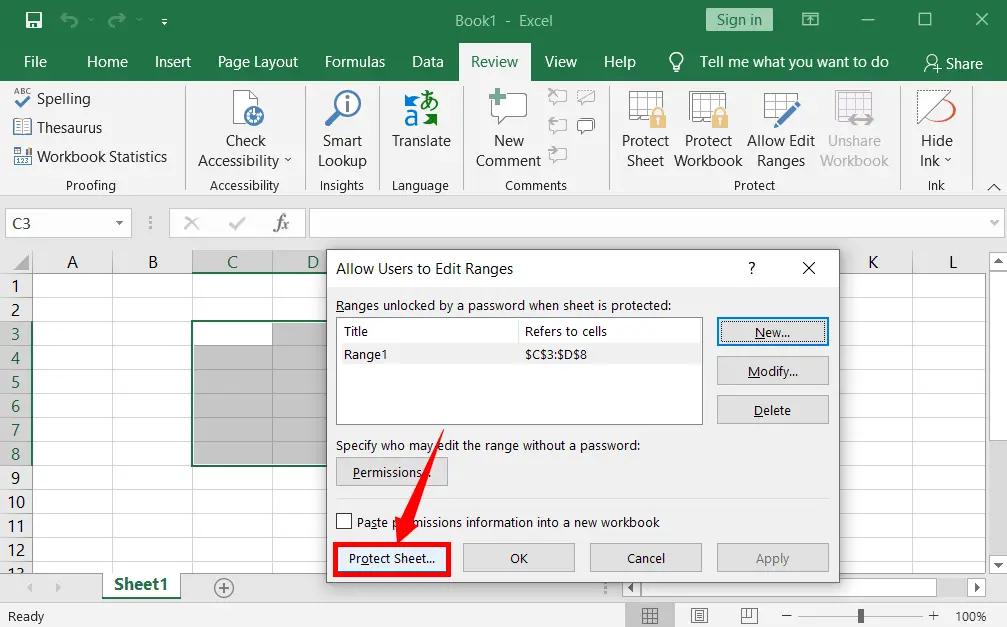
After completing the steps above the picture, now protect the worksheet by entering the password. to do so click the “Protect Sheet” to open another dialogue box.
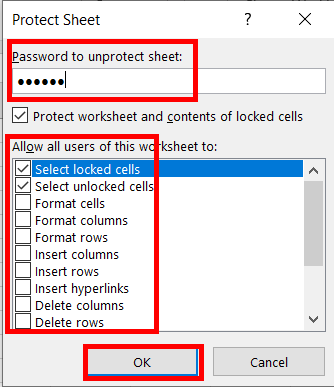
Now enter the password in the “Password to unprotect sheet” box
Check the box of any option you want to allow users to edit range under “Allow all users of this worksheet to:” and click OK to open a confirm password dialogue box
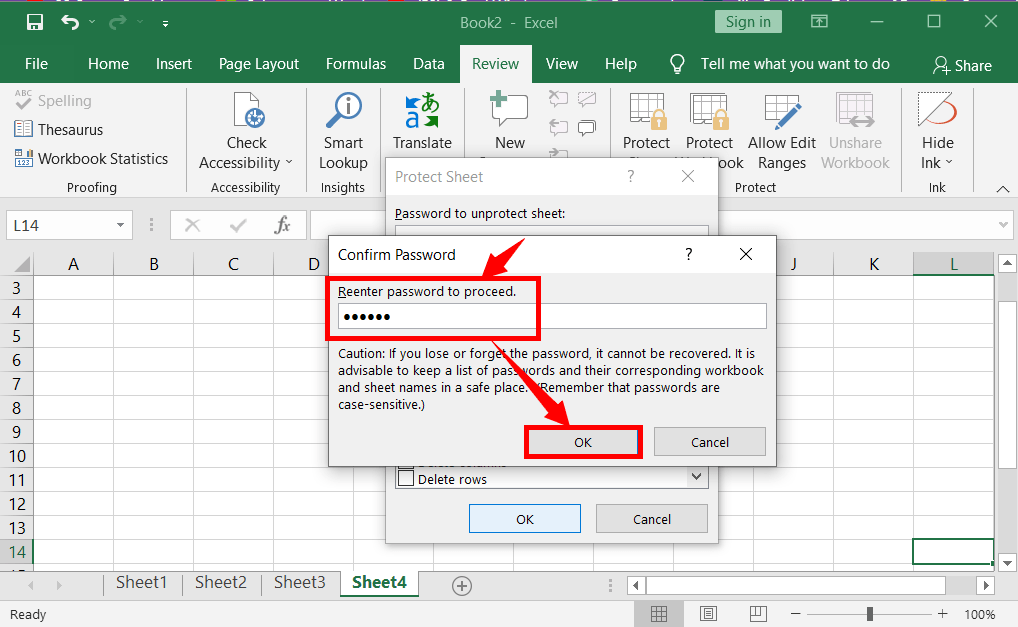
Now reenter the password to confirm it and click OK.
2. Edit ranges by selecting the specific range:
In this method of allowing users to edit ranges, a user is fully allowed to edit ranges without entering a password. But a user may partially or not allow editing the worksheet. It depends on the options you have selected.
Select the range that you want to allow users to edit range
Right-click on the selected range
Click format cells
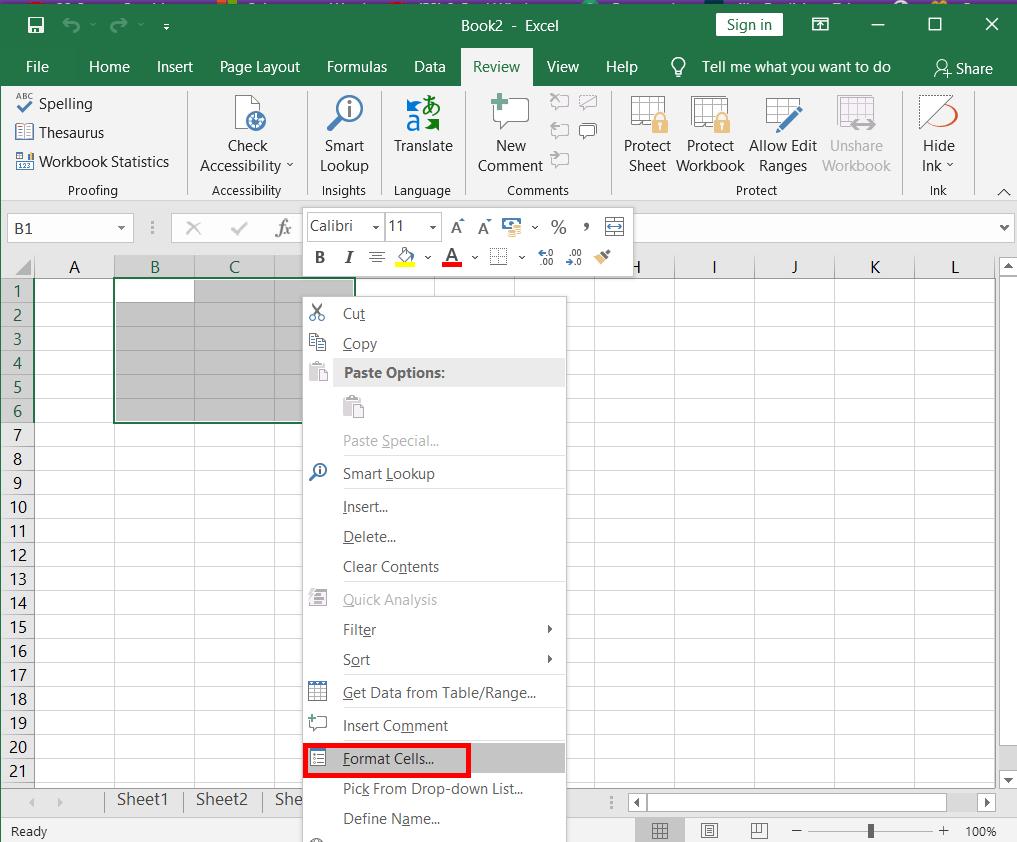
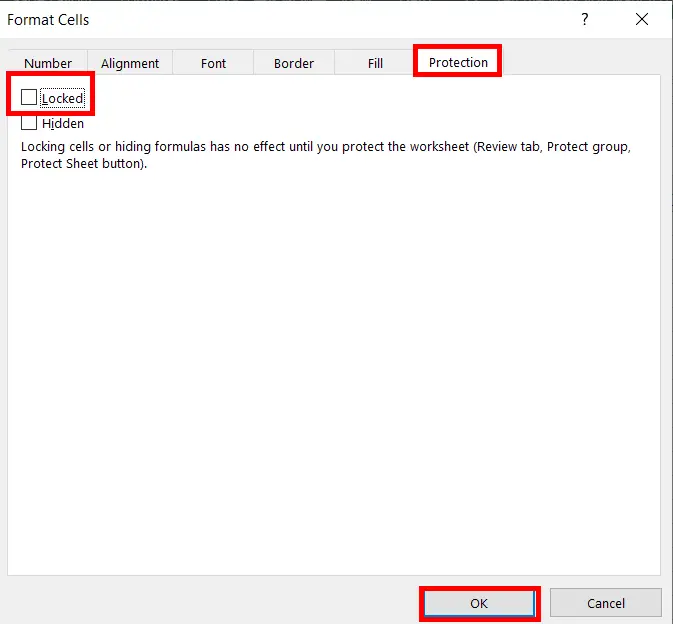
On the Format Cells dialogue box, click “Protection” untick “Locked” and click OK
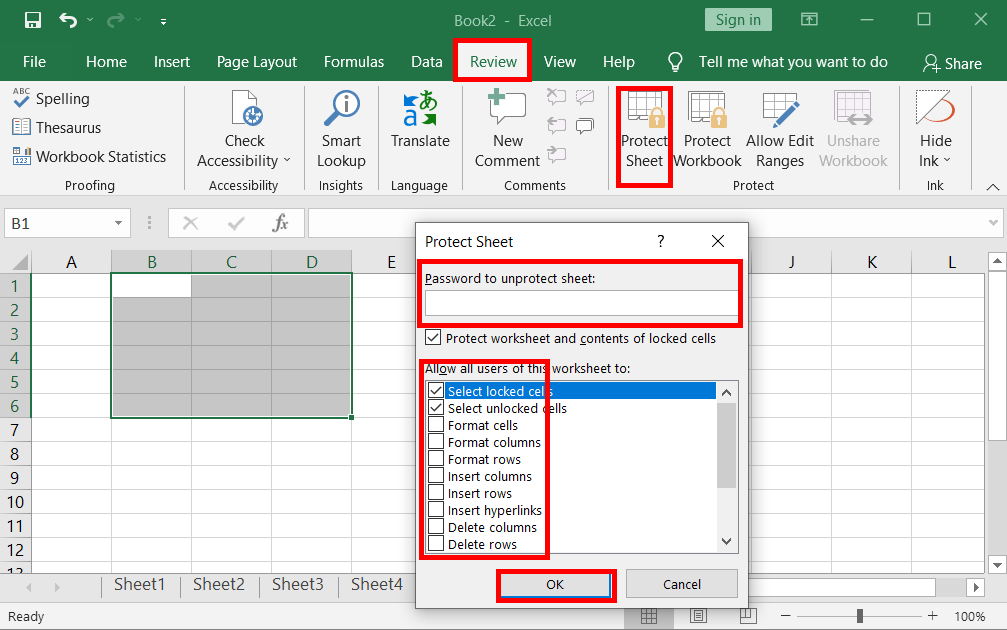
Now go to the review tab and click “Protect Sheet“
Enter the password to a worksheet in the “Password to unprotect sheet” box and tick or untick different options to allow or disallow users to enter data in a worksheet (except the selected range), then click OK to open a dialogue box
Again enter the password to confirm and click OK.
What is meant by Allow Edit Ranges in Excel?
Allow edits feature is very useful for you to allow others to edit a particular range in Excel and deny the rest of the entire range.
How can I specify which users can edit certain ranges in Excel?
You can define users and their editing permissions by clicking “New” in the “Allow Users to Edit Ranges” dialog and assigning specific individuals or groups.
Is it possible to set a password for edit ranges to restrict unauthorized access?
Yes, you can set a password to protect edit ranges, ensuring only those with the password can make changes.
How do I remove or change edit range permissions in Excel?
You can manage existing edit ranges, change permissions, or remove them by going to “Review” > “Allow Users to Edit Ranges” and selecting the range to modify.
Can multiple edit ranges exist within a single Excel sheet?
Yes, you can define multiple edit ranges with different permissions on the same sheet to manage editing access more precisely.