
Windows Snipping Tool is a free built-in tool that can be used to take screenshots in a variety of ways.
It allows you to capture screenshots of a portion or a whole screen as images.
Free-form Snip (capture a freehand selection), Rectangular Snip (grab a rectangular chunk), Window Snip (catch an entire window), and Full-screen Snip (capture the entire screen) are among the capture modes available in Snipping Tool.
You can save, copy to the clipboard, or share a snippet immediately from the tool after you’ve captured it.
The older versions of Windows do not have specific shortcuts. However, Microsoft has released a keyboard shortcut in the latest versions of the Windows operating system.
There is no need to install any other third-party app to take a screenshot.
In this article, you are going to learn Essential Snipping Tool Shortcuts for Windows 12, 11, 10, and 8.1 computers. It is a must-read for every Windows user.
Table of Contents
Snipping Tool Shortcuts in Windows 12, 11, 10, and 8.1
The following is one of the simplest methods or shortcuts to use the tool:
Recommended Keyboard Shortcuts:
Launch Snipping Tool: Press Windows key + Shift + S.
This shortcut will launch the Snipping Tool and enable the snipping capability.
Capture a rectangular snip: Press Ctrl + PrtScn.
Ctrl + PrtScn will take a rectangle snip of the screen. Then, by clicking and dragging the pointer, you can pick the desired region.
Capture a free-form snip: Press Ctrl + Shift + PrtScn.
You can use this shortcut to capture a free-form snip. You can create a shape around the area you want to capture with the cursor.
Capture an active window: Press Alt + PrtScn.
The active window on your screen will be captured, including its title bar and border, if you press Alt + PrtScn.
Captures the entire screen: Press PrtScn
When you press the PrtScn key, you will capture the full screen, including all open windows and the desktop.
Other Shortcuts:
| S.No. | Keyboard Shortcut | Description |
| 1. | Window Key + Shift + S | Take a Rectangular Snip, a free snip, a window snip, or a Fullscreen Snip. |
The remaining 9 shortcuts are given below the second method.
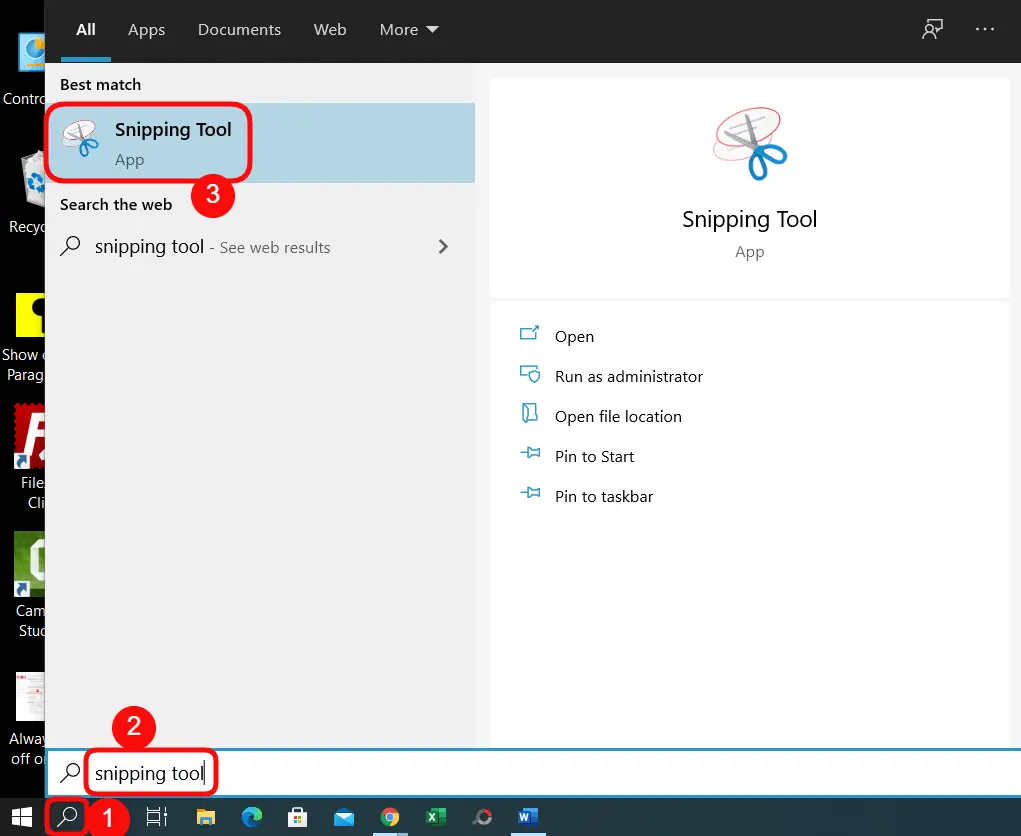
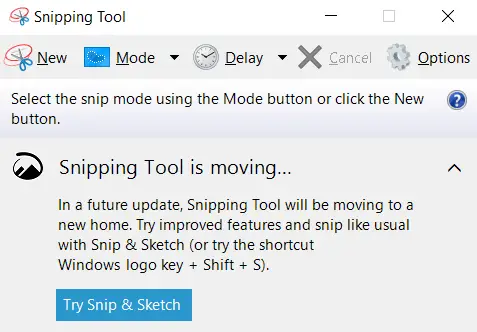
Before using shortcuts, click search next to the Windows logo, type the snipping tool, and then select it to open its dialogue box. After that use the keyboard shortcuts given below these two screenshots.
Learn how to take a screenshot in 5 different ways
| S. No. | Shortcuts | Description |
| 2. | Alt+O | Choose Snipping Options |
| 3. | Alt+M | Choose any snipping mode from “Rectangular Snip, Freefrom Snip, Window Snip, and Fullscreen Snip”. |
| 4. | Alt+N | Create a new snip with the selected snip in the previous Mode. |
| 5. | Ctrl + Print. Sc | Capture the screen along with the expanded menu. |
| 6. | Shift or Enter (or) Shift + Arrow, then press Shift or Enter | Keep the mouse on any option and press Shift or Enter to expand its menu. (or) Shift +Arrow to move the cursor to any option, and then press Shift or Enter to expand its menu. |
| 7. | Alt+D | Expands the snip delay menu to select it. |
| 8. | Ctrl+C | Copies the snip |
| 9. | Ctrl+S | Saves the snip |
Read also, Drawing Vertical and Horizontal Lines in Word: 5 Magics.
Conclusion:
As we know, the snipping tool is one of the best tools to capture screens quickly. You may speed up your work by using the Windows snipping shortcuts to capture selected regions or entire screens.
These are useful for opening the Snipping Tool as well as capturing rectangular or free-form snips, capturing active windows, and capturing the entire screen.
These processes save tons of time while also making it easier to gather and exchange visual data.
Ultimately, we can say that these shortcuts improve your productivity and overall user experience, whether you’re annotating your work, sharing content, or documenting essential information.
Windows 10 snipping and Sketching hotkey
The snipping tool keyboard hotkey is Windows logo + key + Shift +S.
How do I capture the entire screen quickly?
Use “Ctrl + Print Screen” to instantly capture the full screen with the Snipping Tool.
What’s the shortcut to open Snipping Tool’s drop-down menu?
Press “Alt + M” to open the snip mode menu for quick selection.
How can I capture a specific window?
Press “Alt + Print Screen” to capture the active window in the Snipping Tool.
Can I copy a snippet to the clipboard directly?
Yes, after snipping, press “Ctrl + C” to copy it to the clipboard for easy pasting.
How do I cancel a snip in progress?
Press the “Esc” key to cancel an ongoing snip and return to the normal screen.
Are these shortcuts consistent across Windows versions?
Yes, these common Snipping Tool shortcuts work in various Windows versions.
Can I customize Snipping Tool shortcuts?
Unfortunately, Snipping Tool doesn’t offer extensive customization for shortcuts.